This design uses bolts and nuts for assembly.
目次
1. Print the pattern.
2. Cut out the pattern along the outer outline.
3. Saw the boards along the pattern outline.
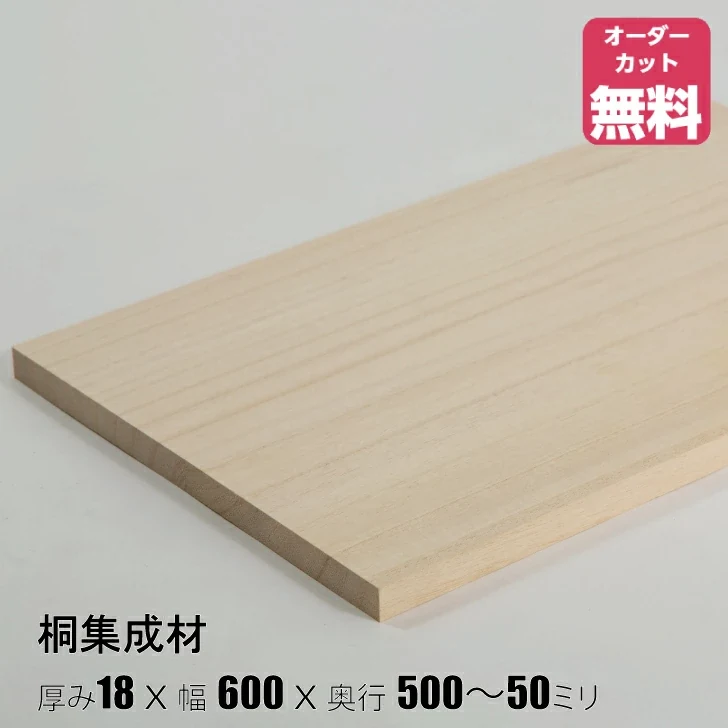
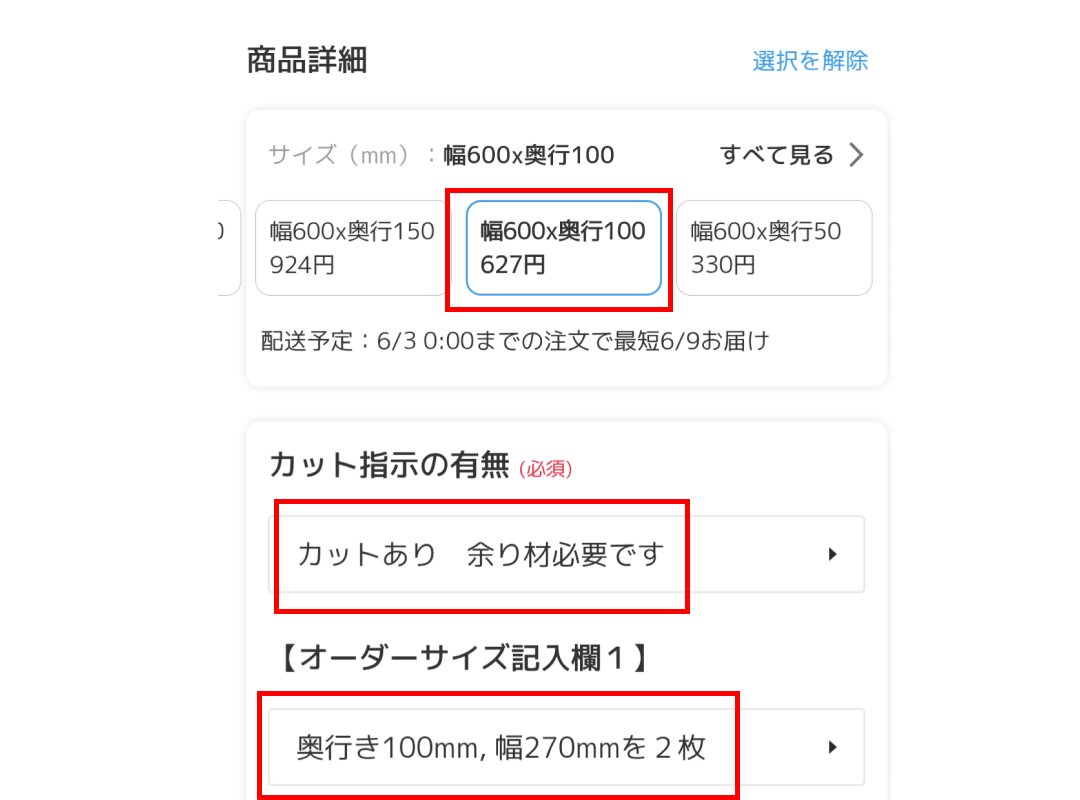
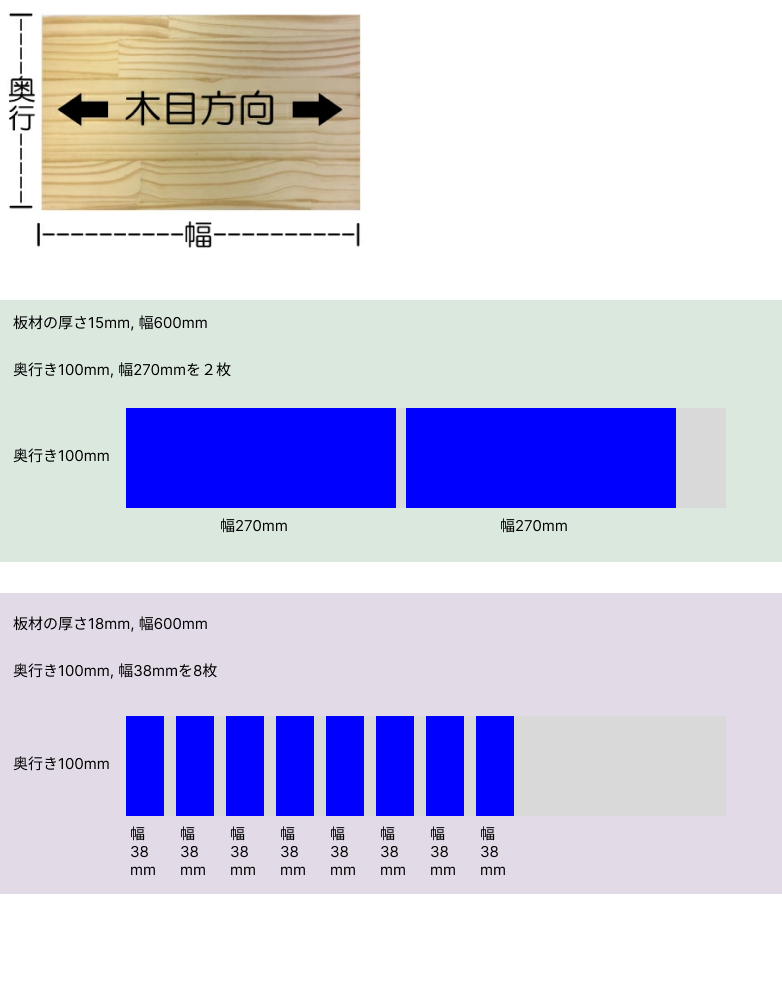
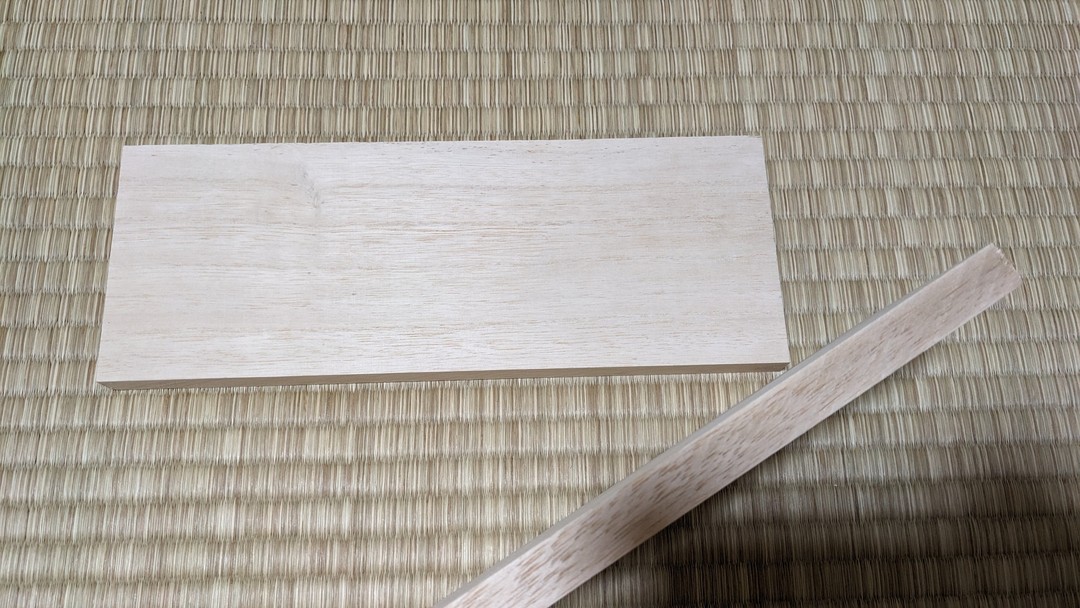
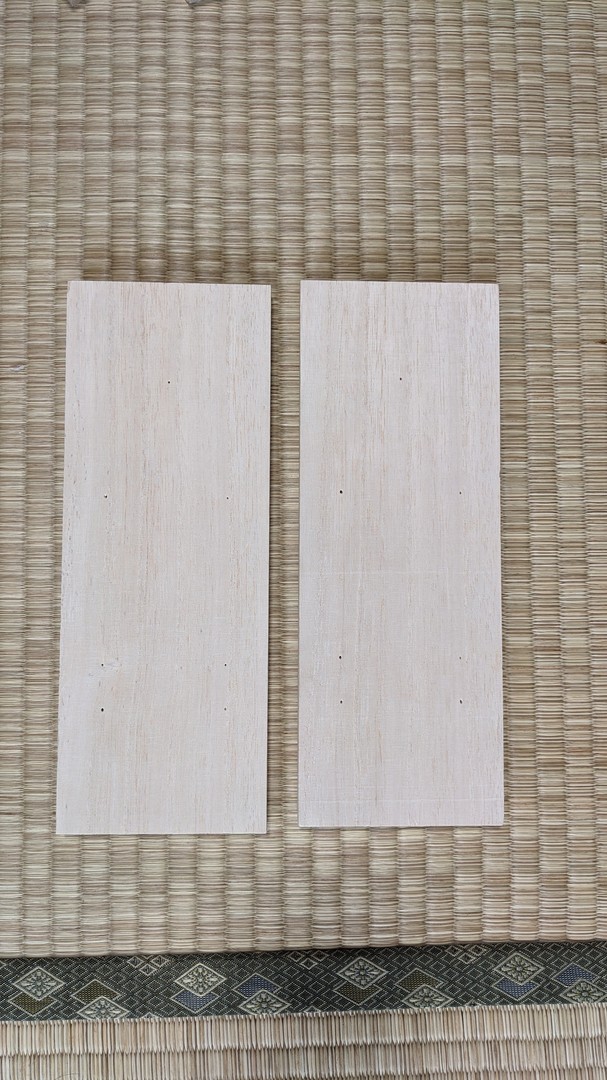
Base: two pieces, 15 mm thick
Saw the boards along the pattern outline.
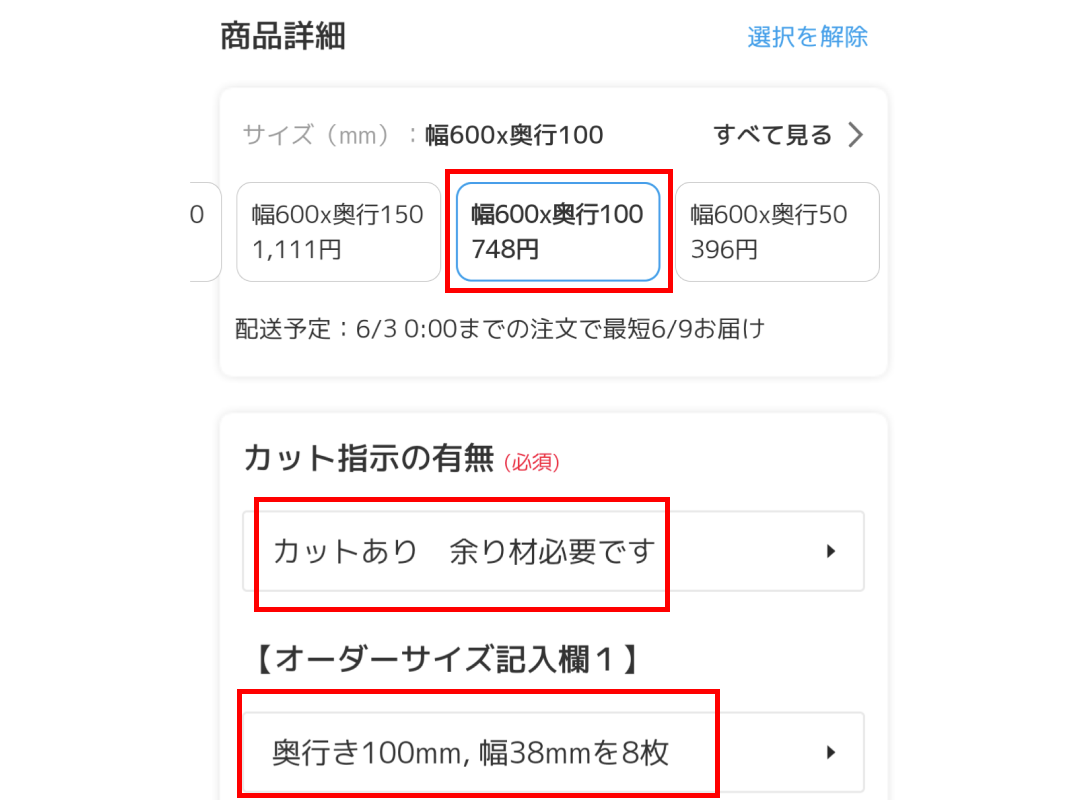
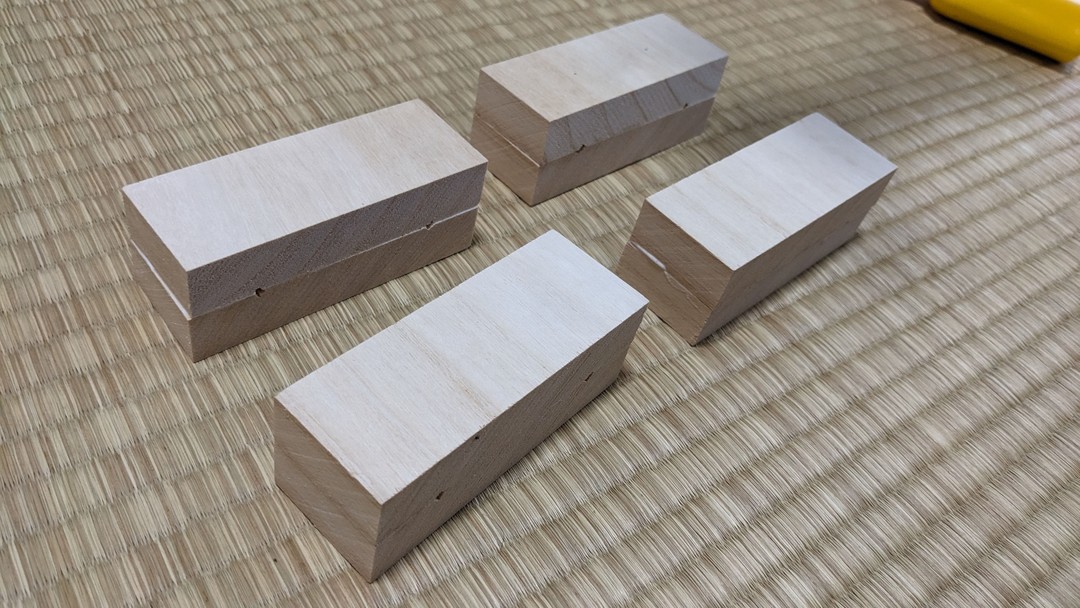
Teeth: eight pieces, 18 mm thick
4. If cutting is difficult, order pre-cut boards on Rakuten.

Rakuten links are in the description.
From the email sent when you bought the pattern,
copy the “Rakuten size specification” for your size. 15 mm thick
From the email sent when you bought the pattern,
copy the “Rakuten size specification” for your size. 18 mm thick
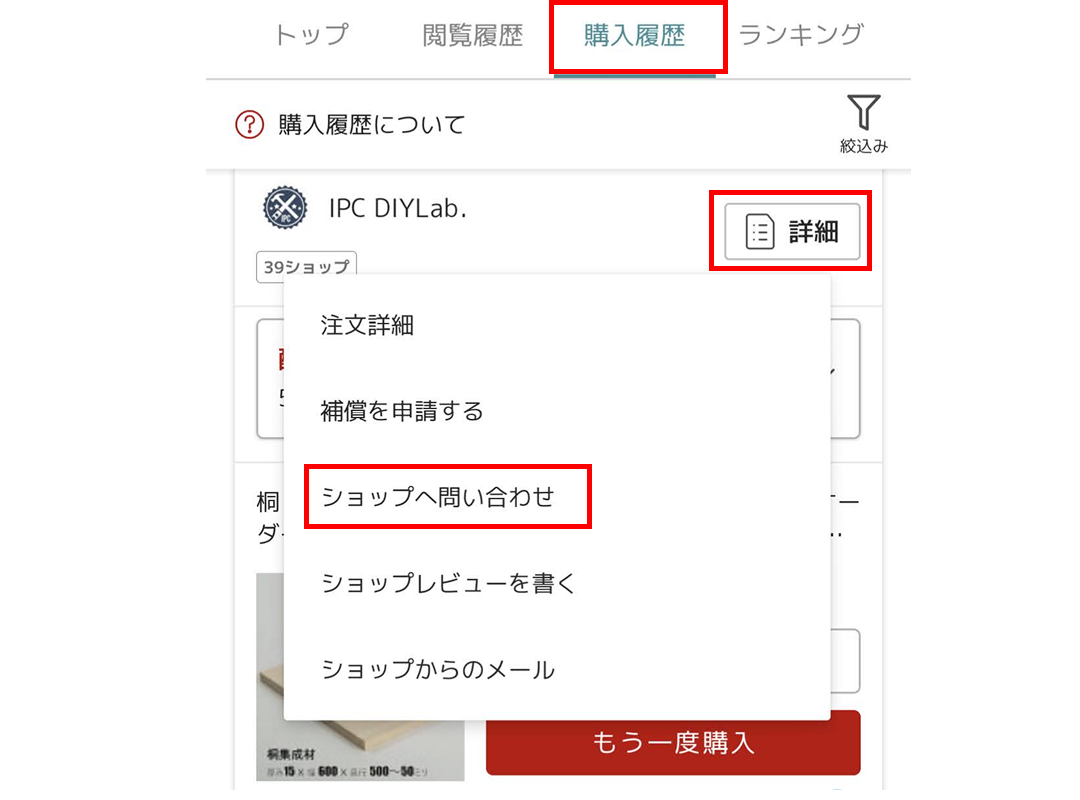
Attach the “cutting diagram” included with the pattern,
and send it to the shop via Rakuten order history (contact form).
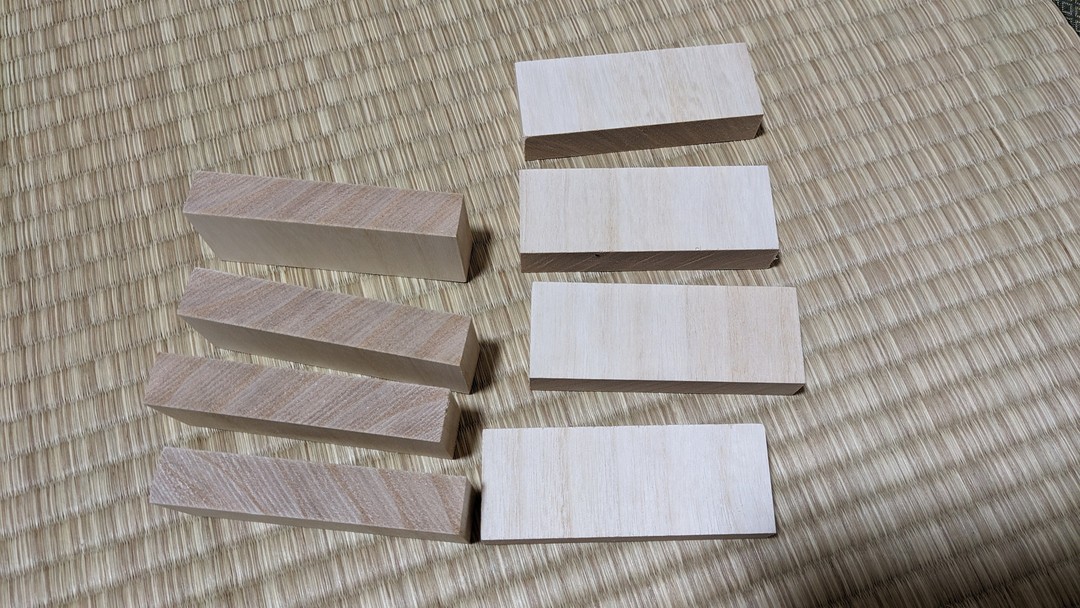
5. Unpack the delivered geta parts.
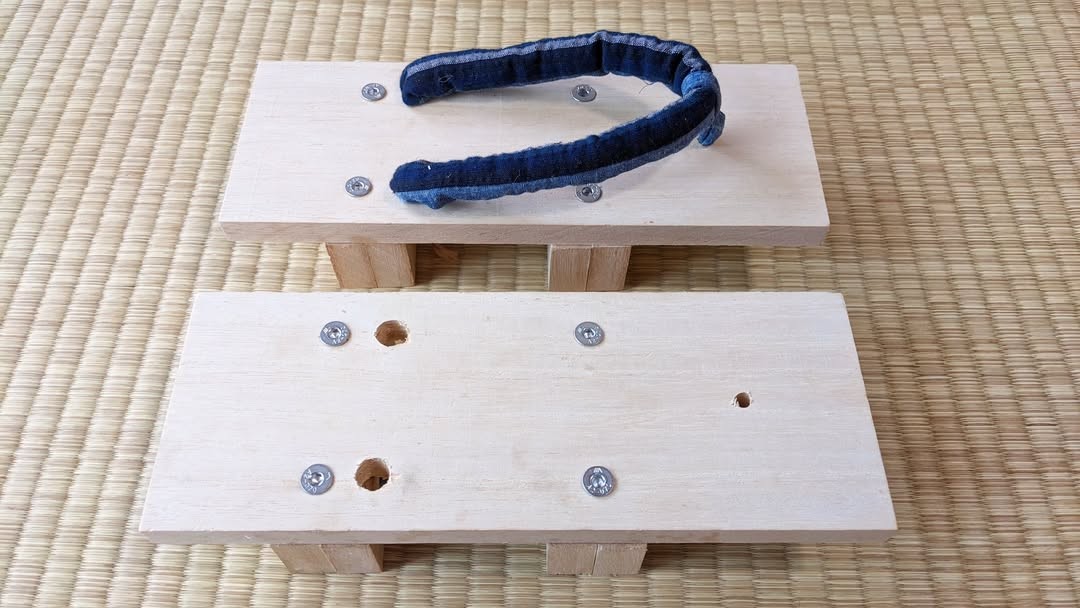
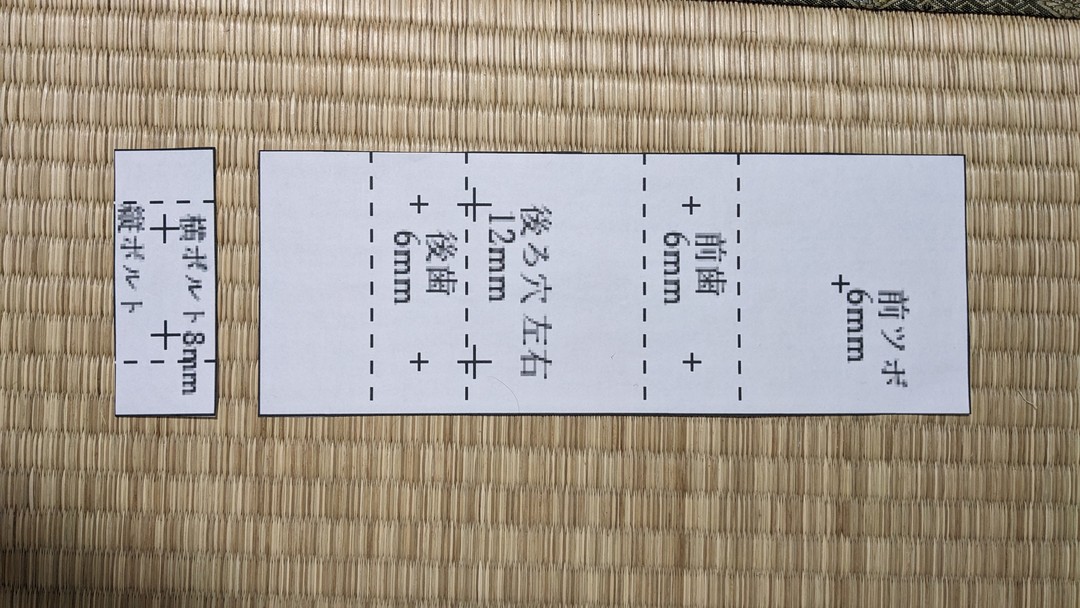
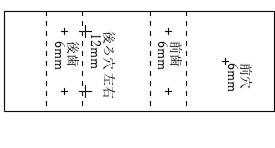
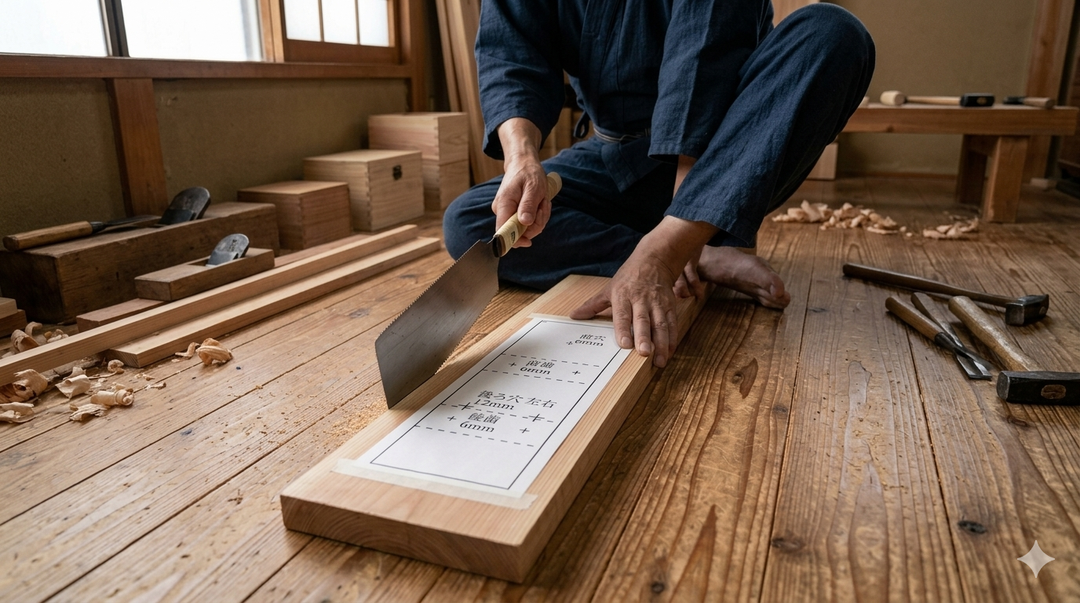
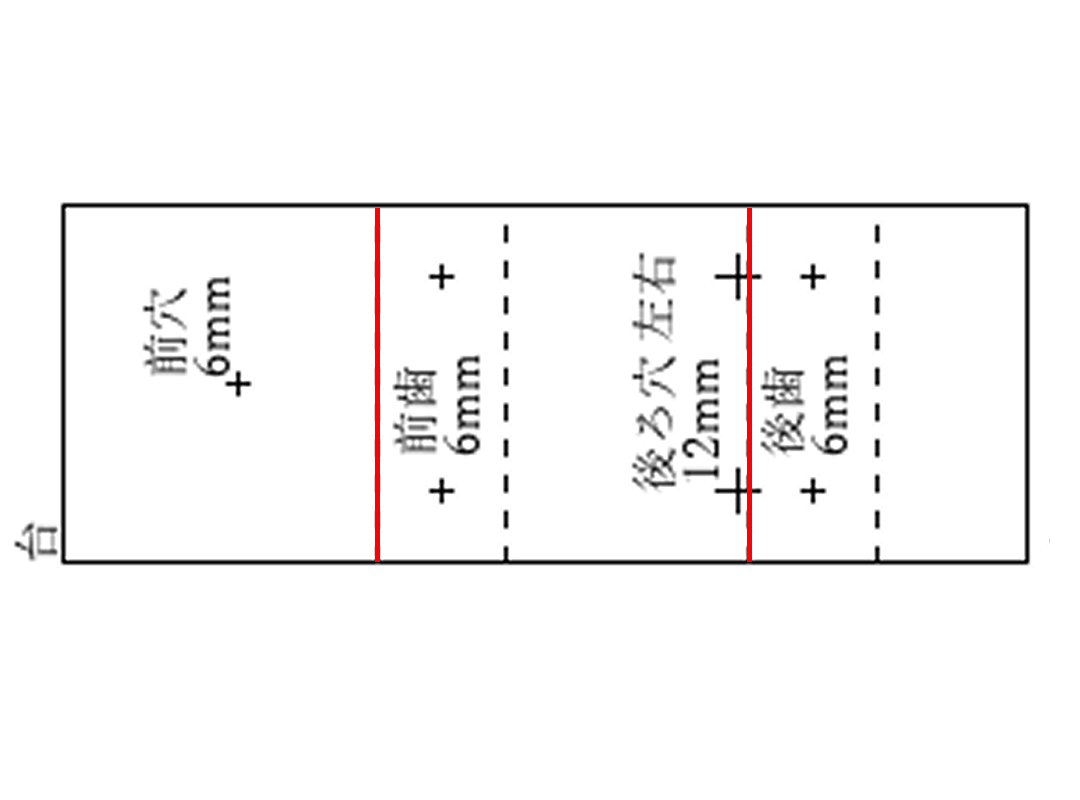
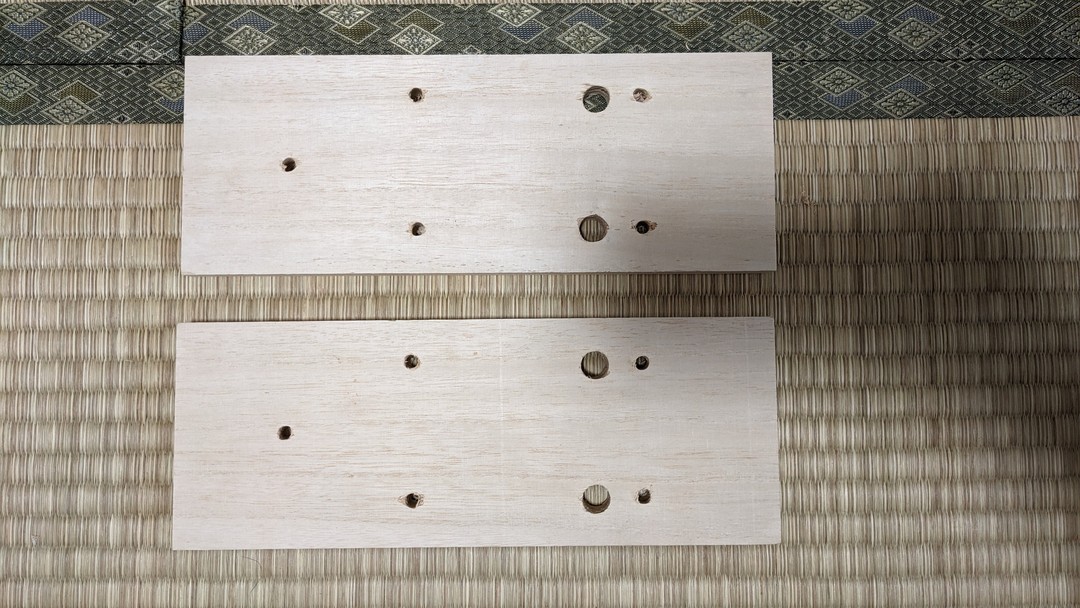
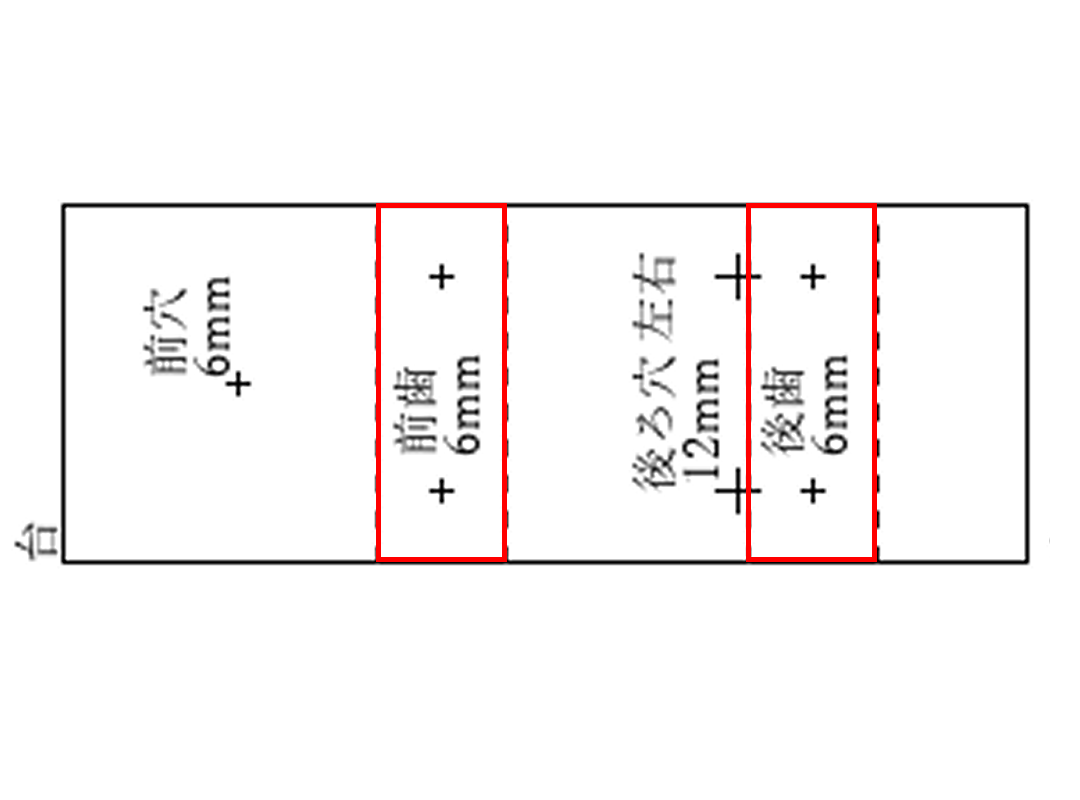
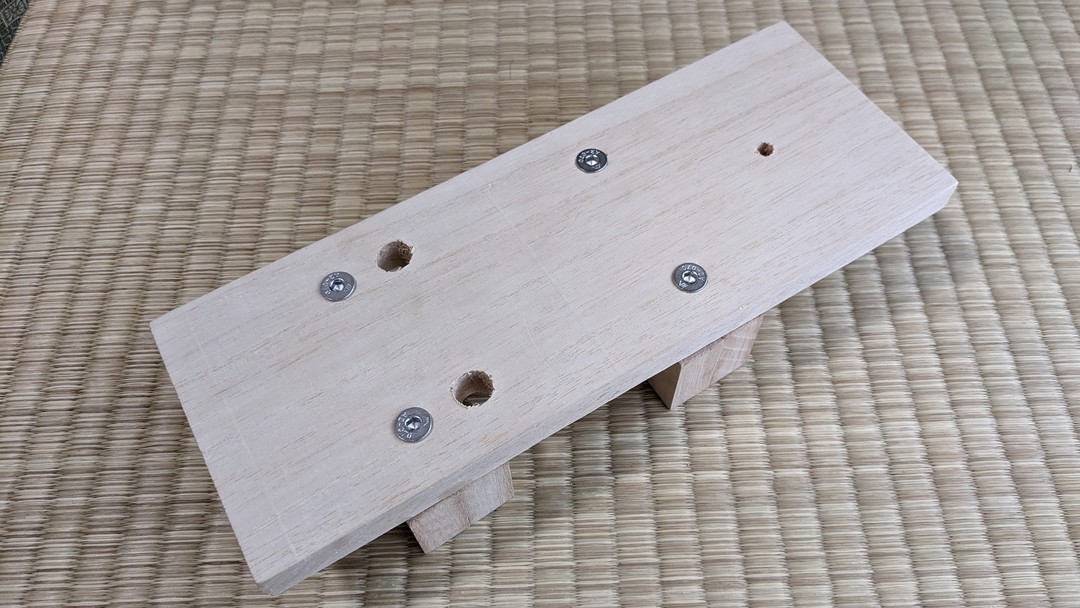
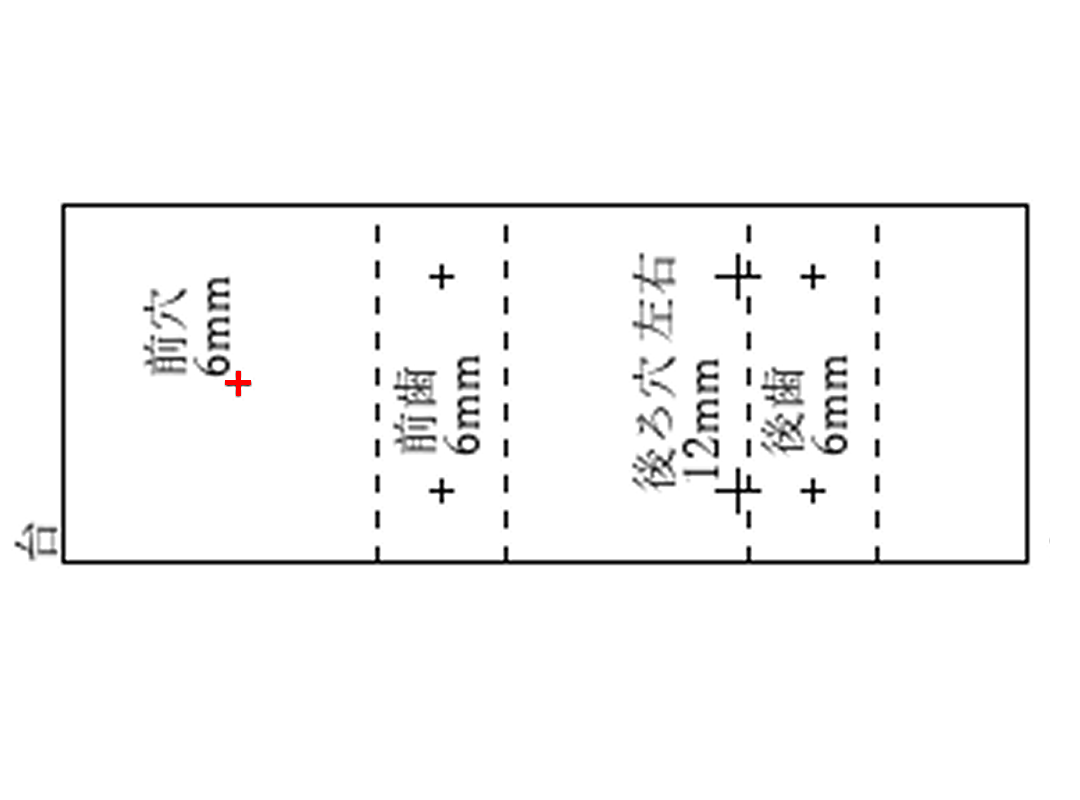
6. Place the pattern on the top side of the base,
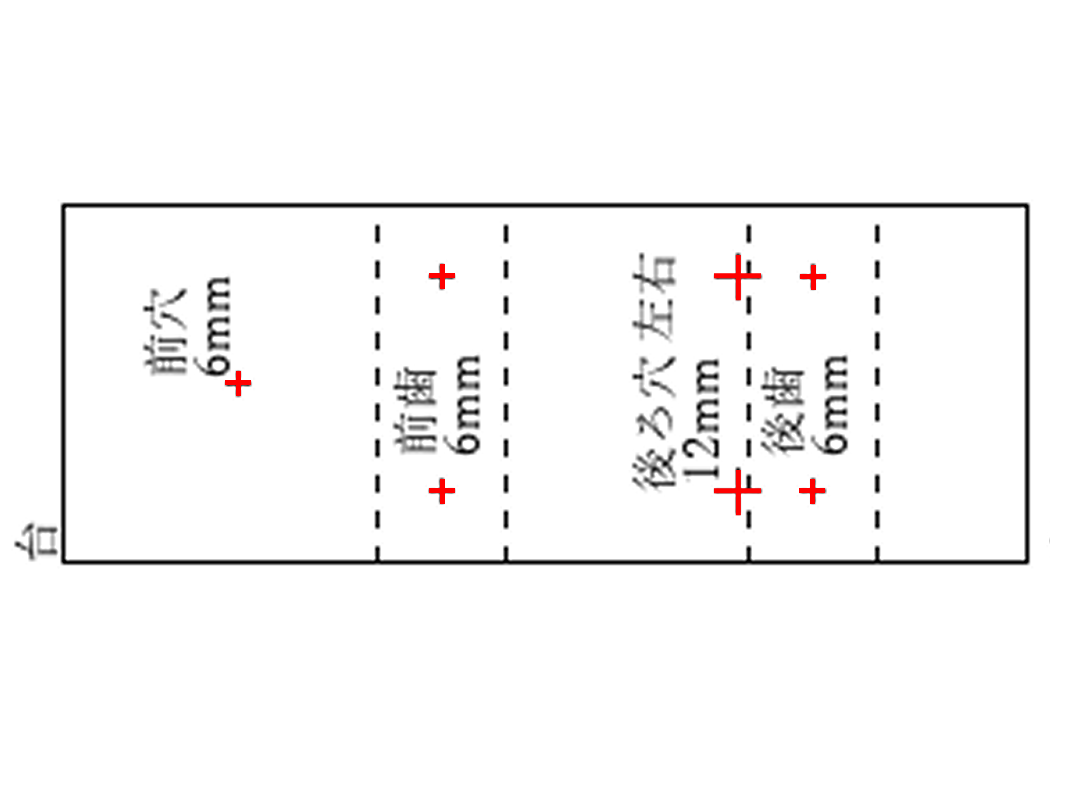
・Front hole ・Front tooth bolt hole
・Left and right rear holes ・Rear tooth bolt holes
Mark the center of each with a center punch.
Do this on both left and right bases.
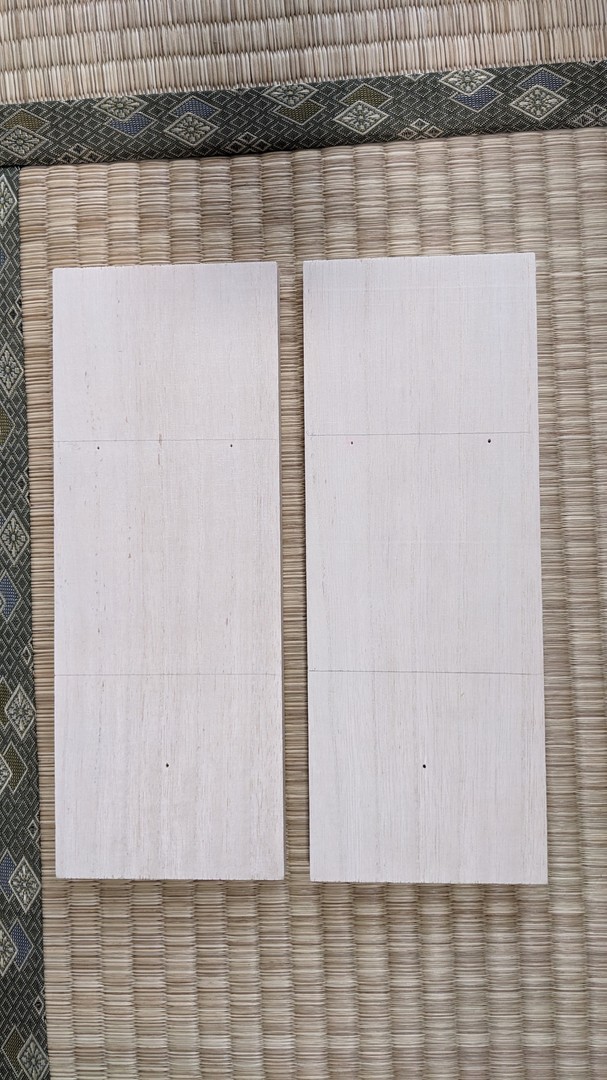
7. Turn the base over to the unmarked side and place the pattern,
・Front teeth
・Rear teeth
Fold the pattern on the front fold lines and mark with a pencil.
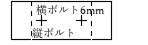
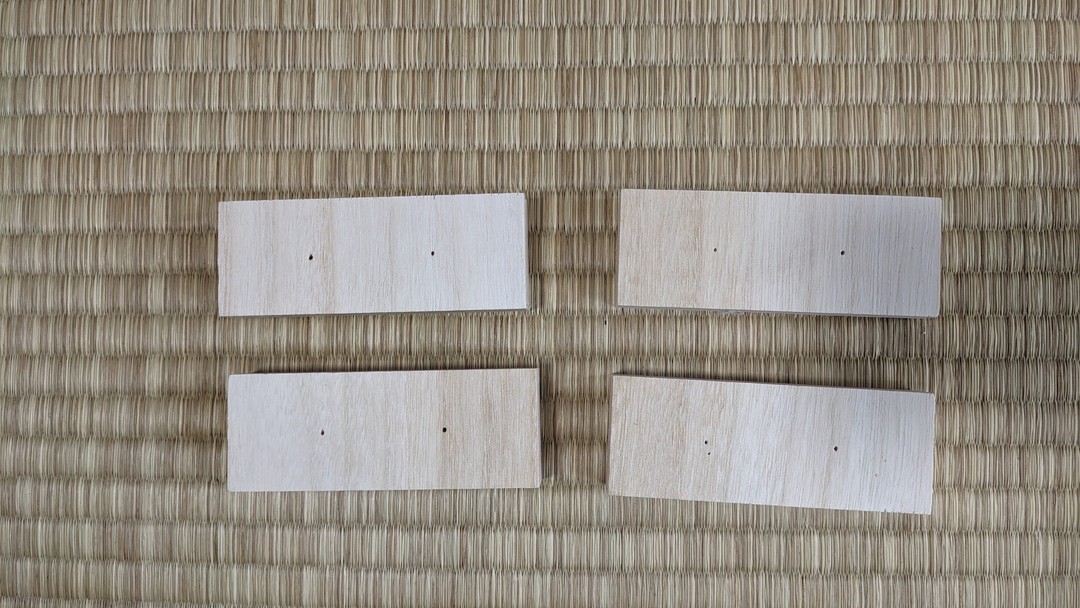
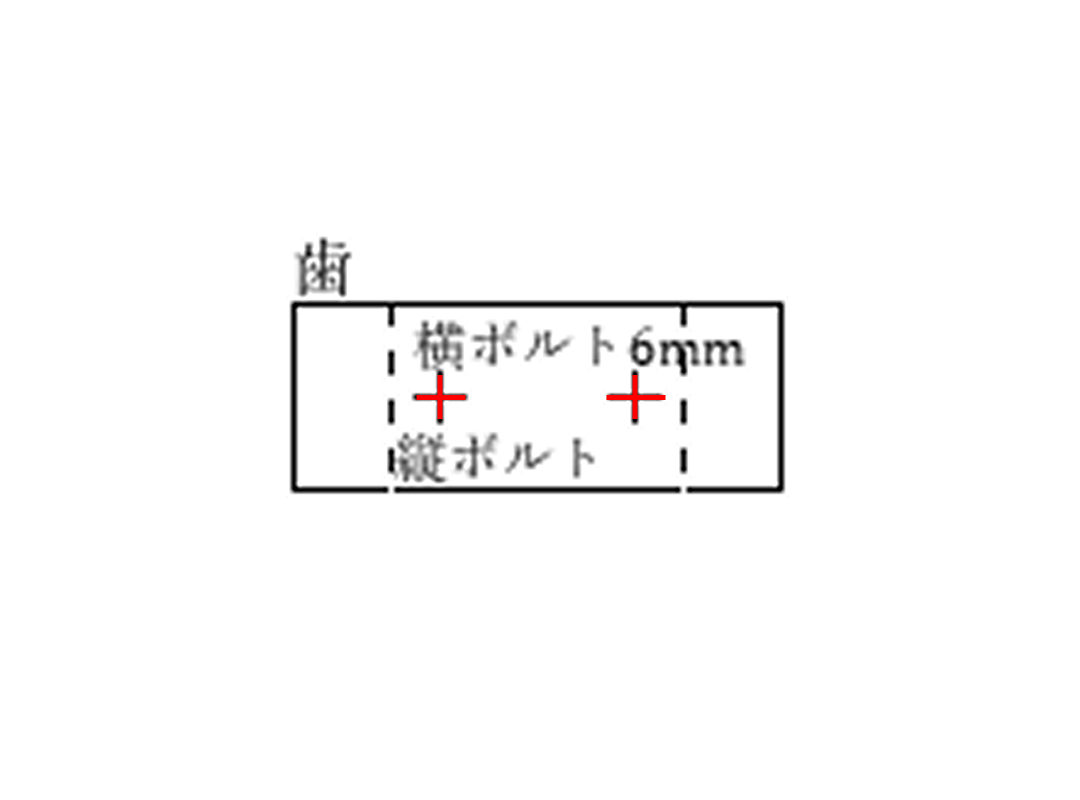
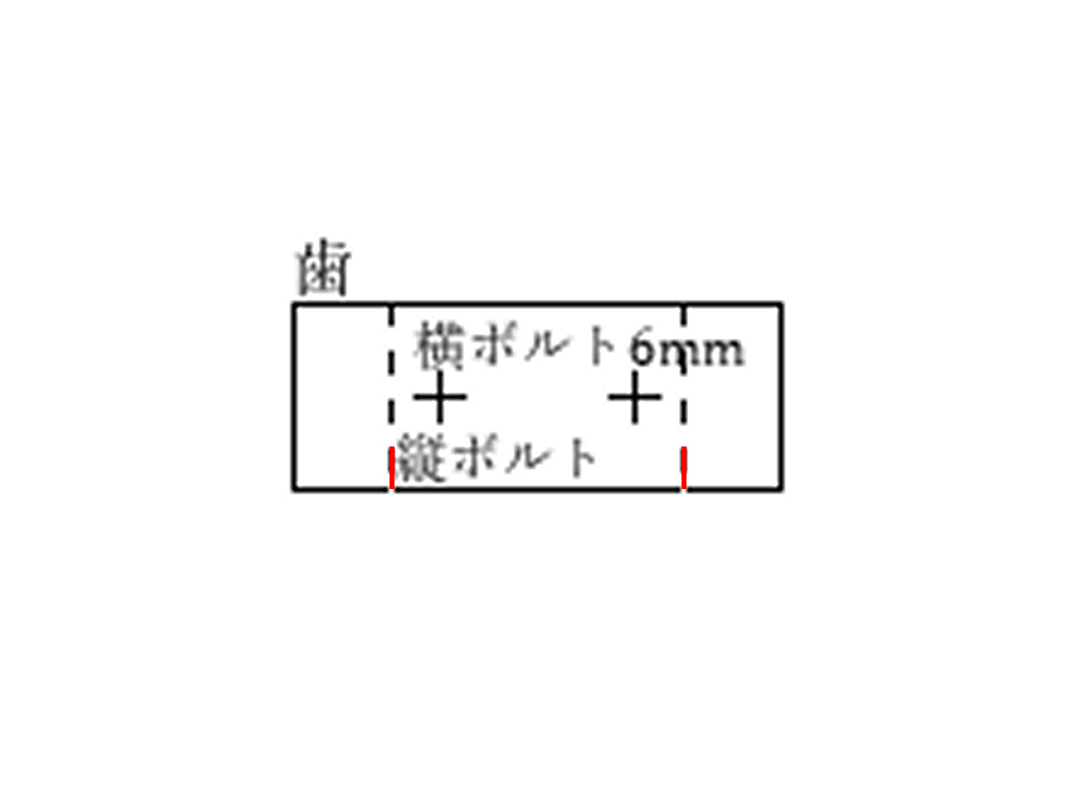
8. Place the pattern on a tooth and center-punch the horizontal bolt hole.
Do this on four teeth.
9. Turn the tooth to the side without holes and place the pattern,
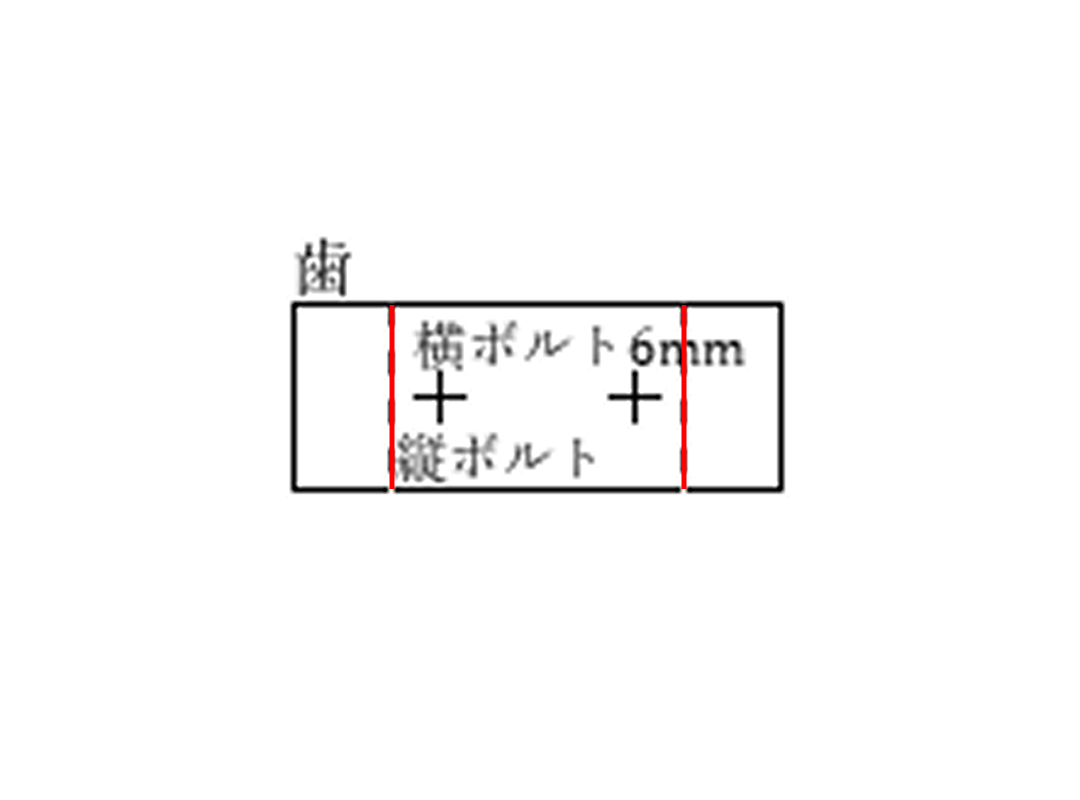
Fold the pattern on the vertical bolt-hole fold line and draw a line along the fold with a pencil.
Do this on all eight teeth.
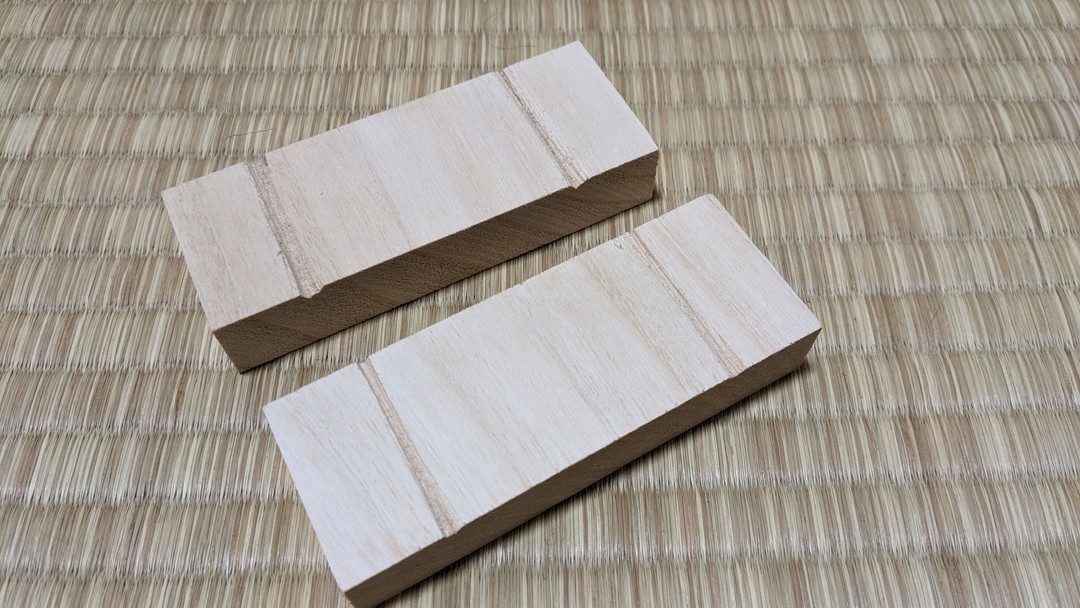
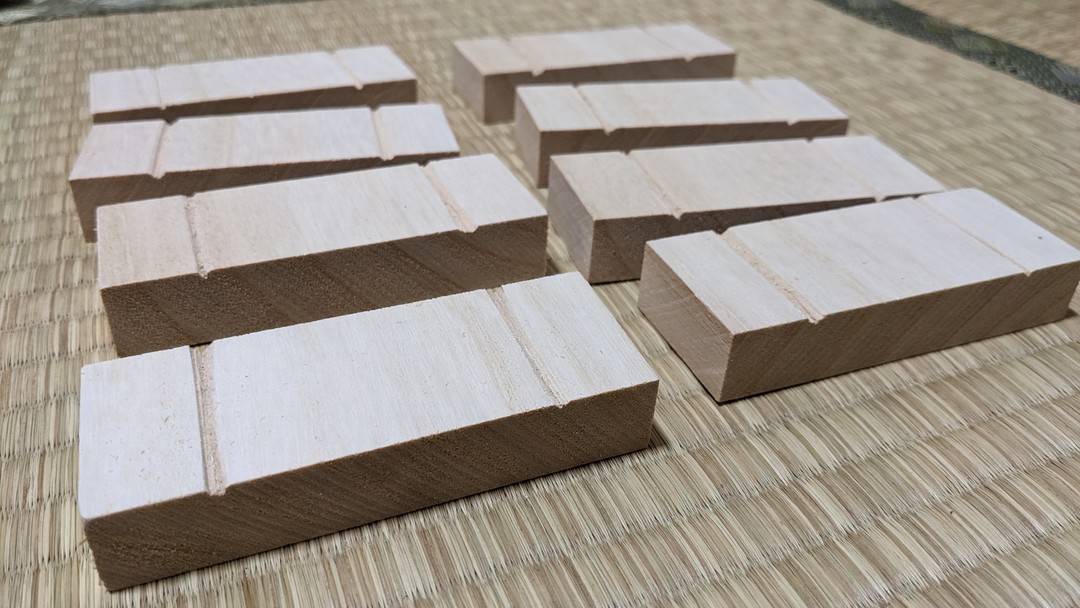
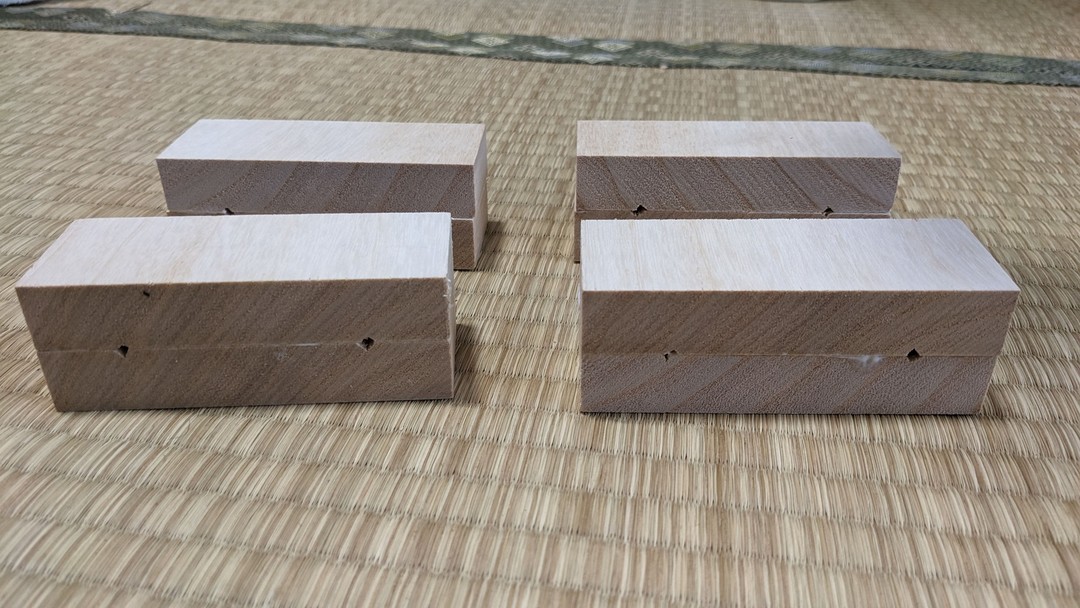
10. Along the marked lines on the teeth, lightly cut grooves with a saw.
Shave straight a little, then shave from diagonally left and right to form a groove.
About 2 mm deep.
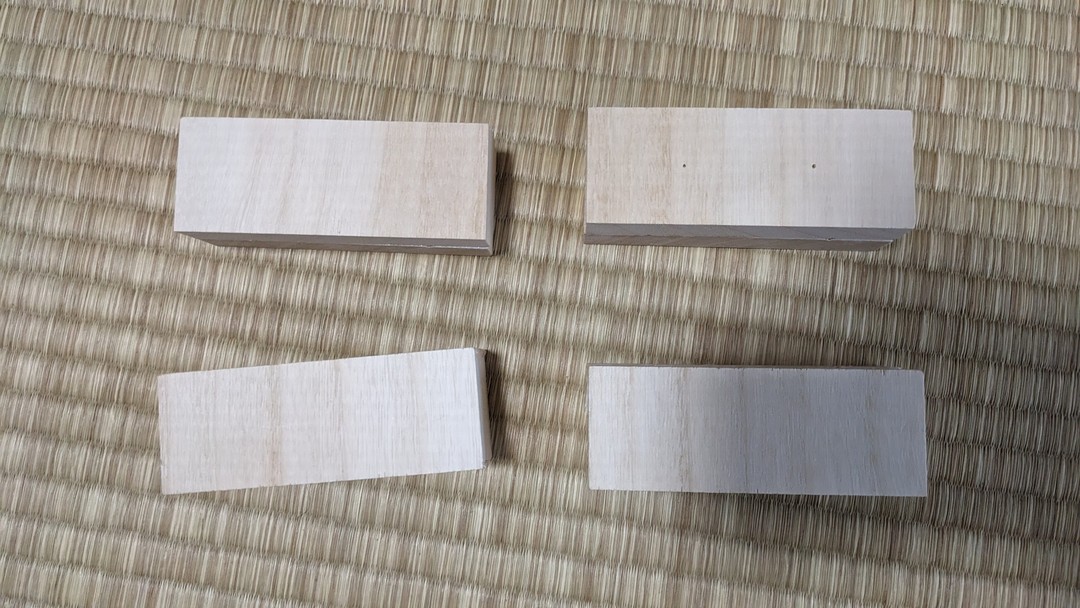
11. Apply wood glue to the grooved side.
Avoid applying too much so glue does not remain in the groove.
Match the sides with and without horizontal bolt-hole marks,
and glue the glued faces together.
Place a weight on top and let dry.
Do this with eight teeth in four pairs.

Let dry for three days.
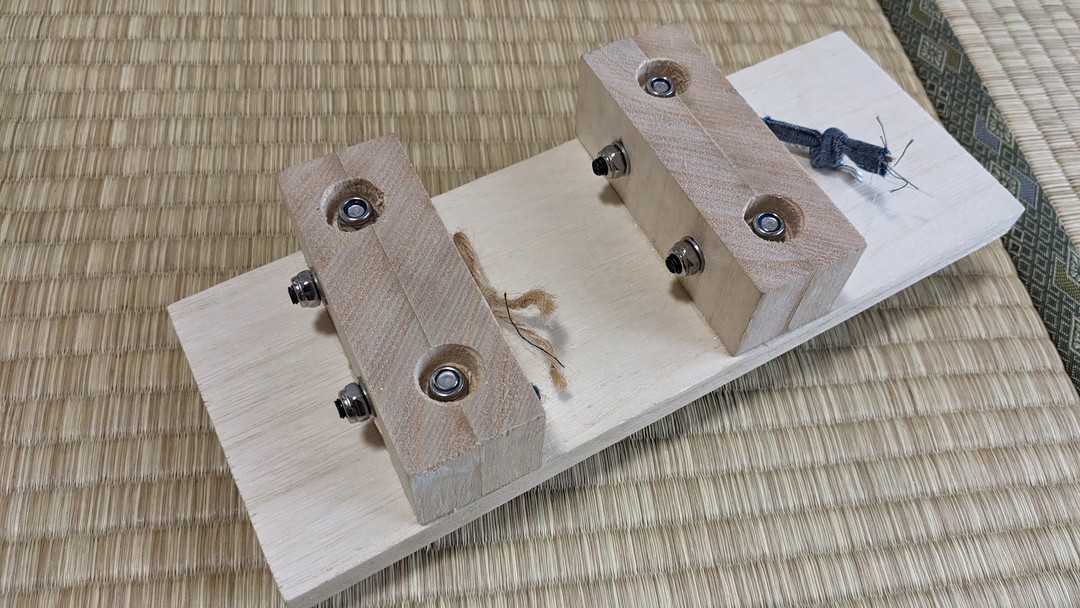
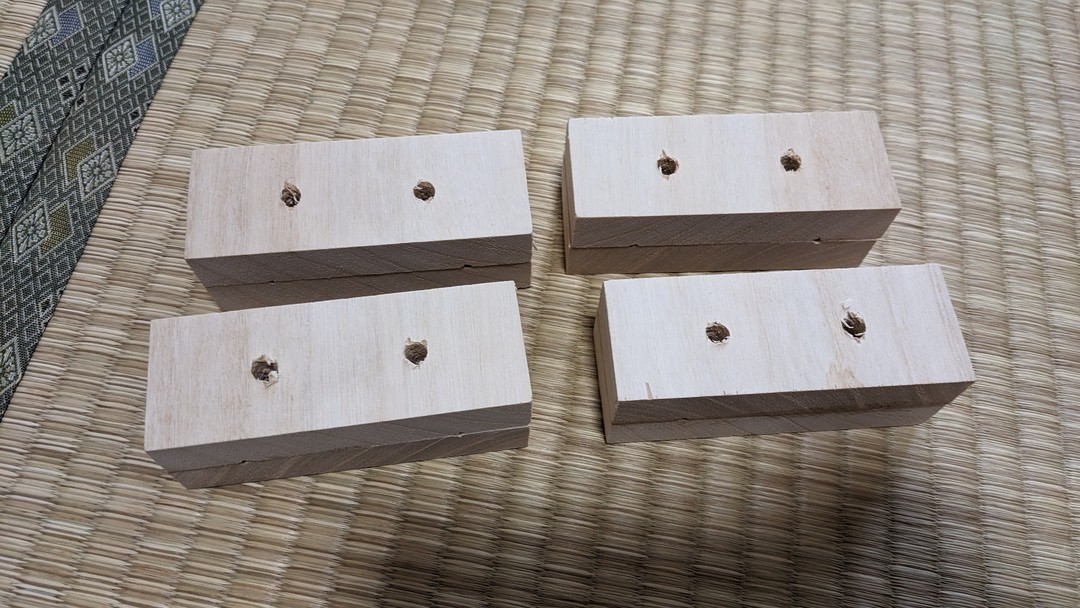
12. Drill holes from the horizontal bolt-hole marks on the teeth. 6 mm diameter.
Do this on four pairs of teeth.
13. Insert M6 carriage bolts
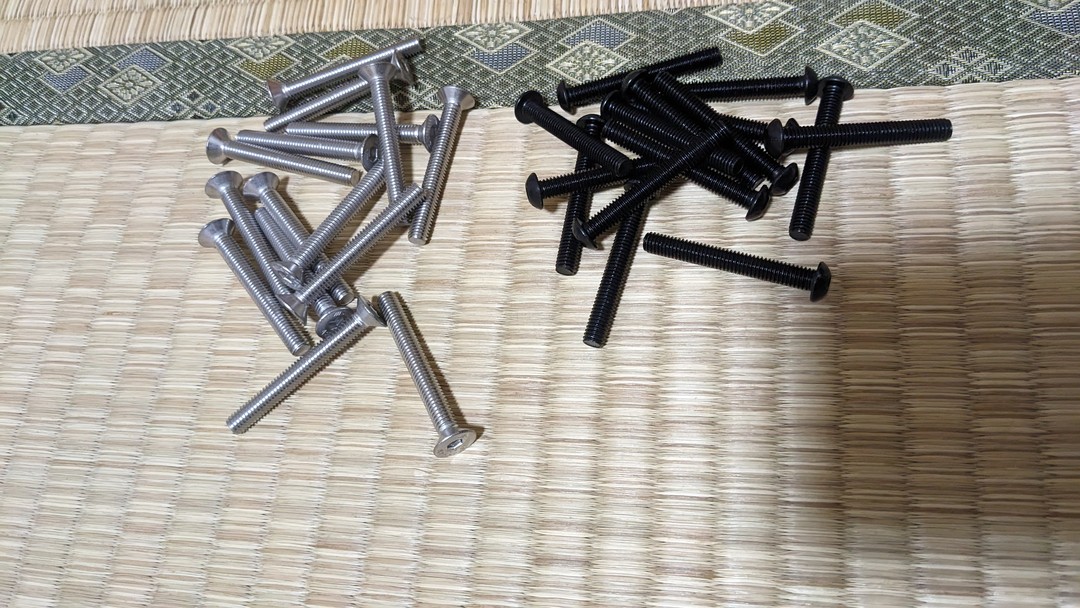
through the horizontal bolt holes on the teeth,
add washers, and tighten the nuts.
* Check the pattern purchase email for bolt length.
Do this on four pairs of teeth.
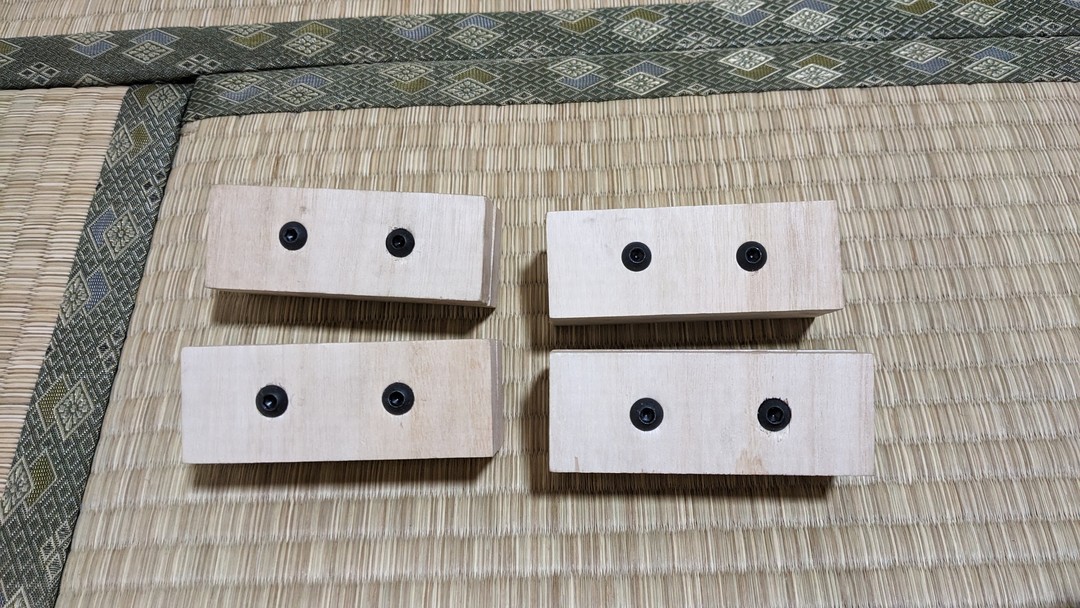
14. Drill the vertical bolt holes on the teeth along the grooves.

Use a 6 mm drill bit.
Do this on four pairs of teeth.
15. On the bottom of the teeth (the side that touches the ground), drill holes for washers and nuts.
15 mm diameter (washer diameter), 1 cm deep (height of washer and nut).

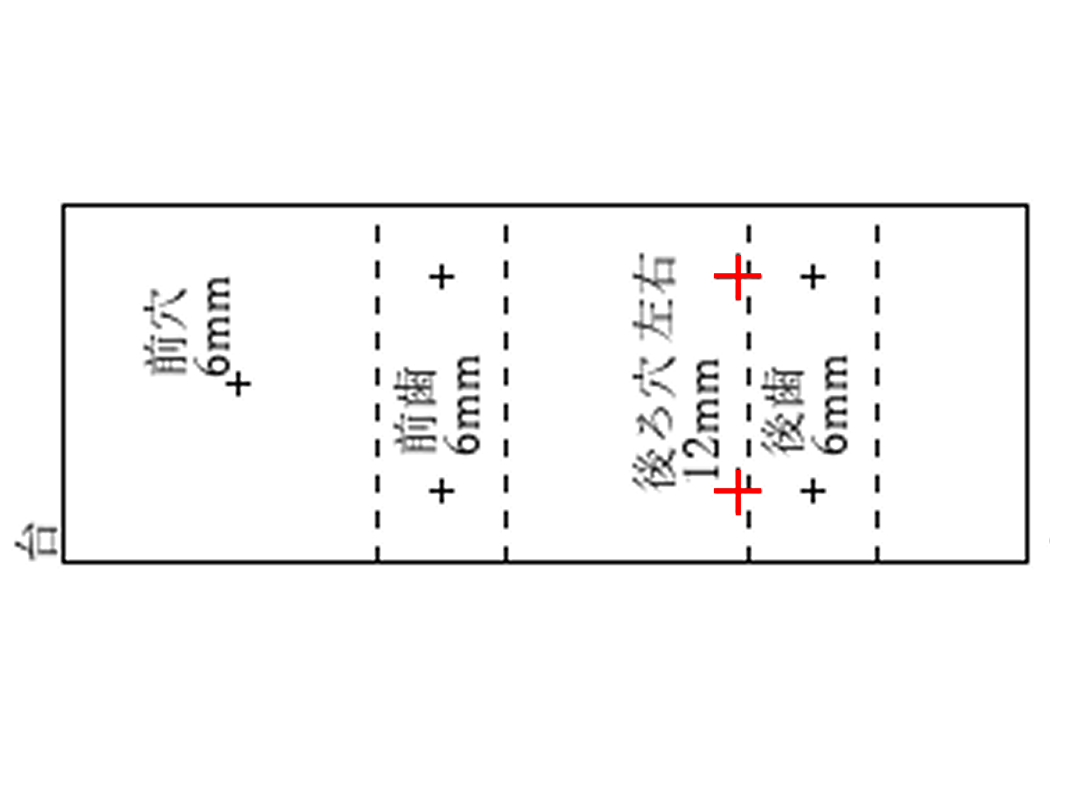
16. Drill holes on the base from the marked positions.
・Rear holes: 12 mm diameter
・All others: 6 mm diameter.
Do this on both left and right bases.
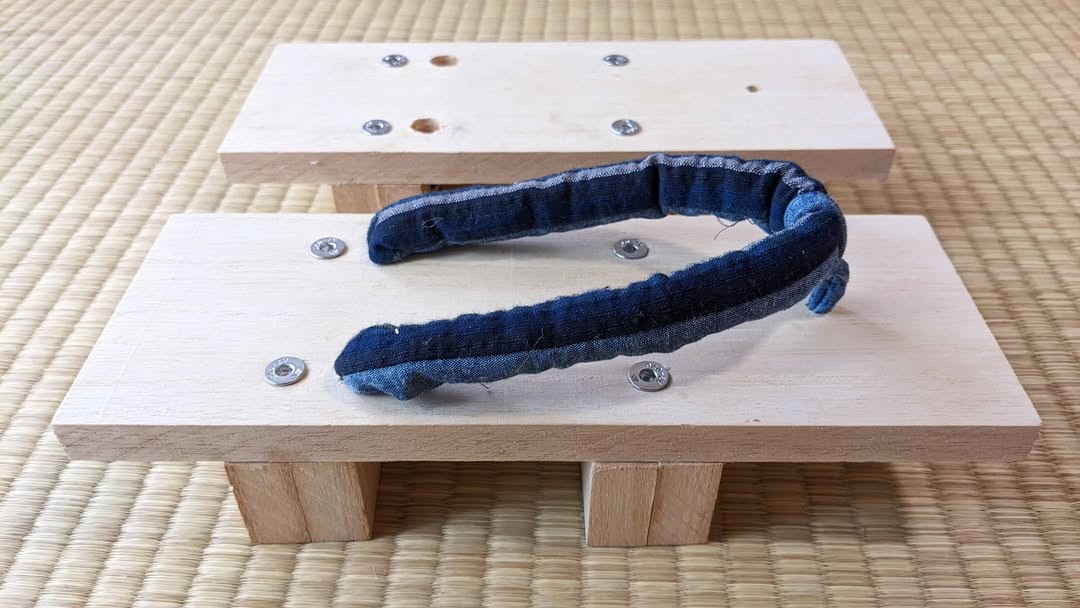
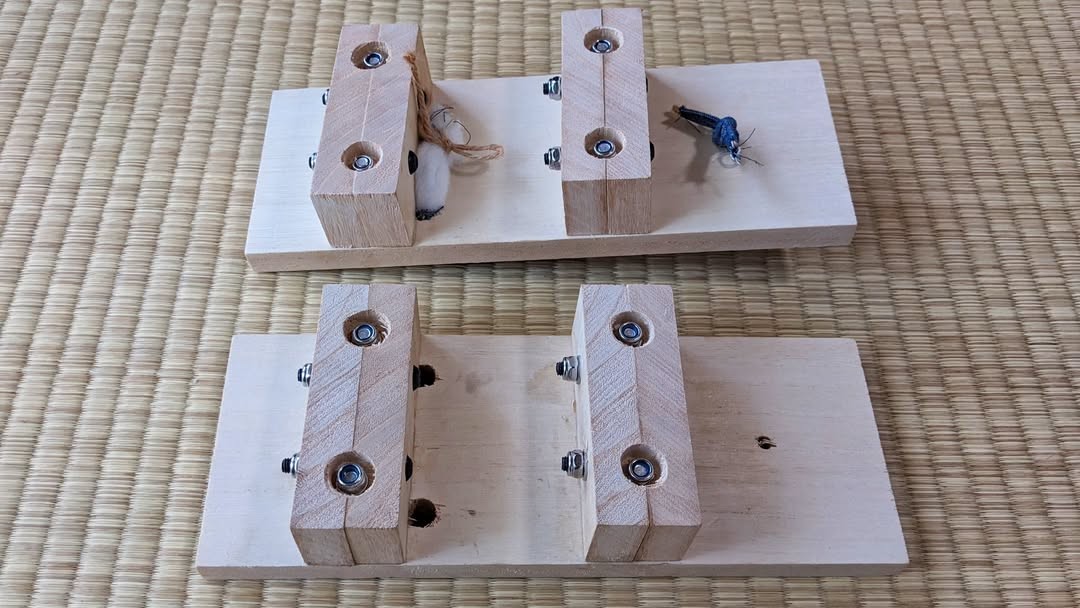
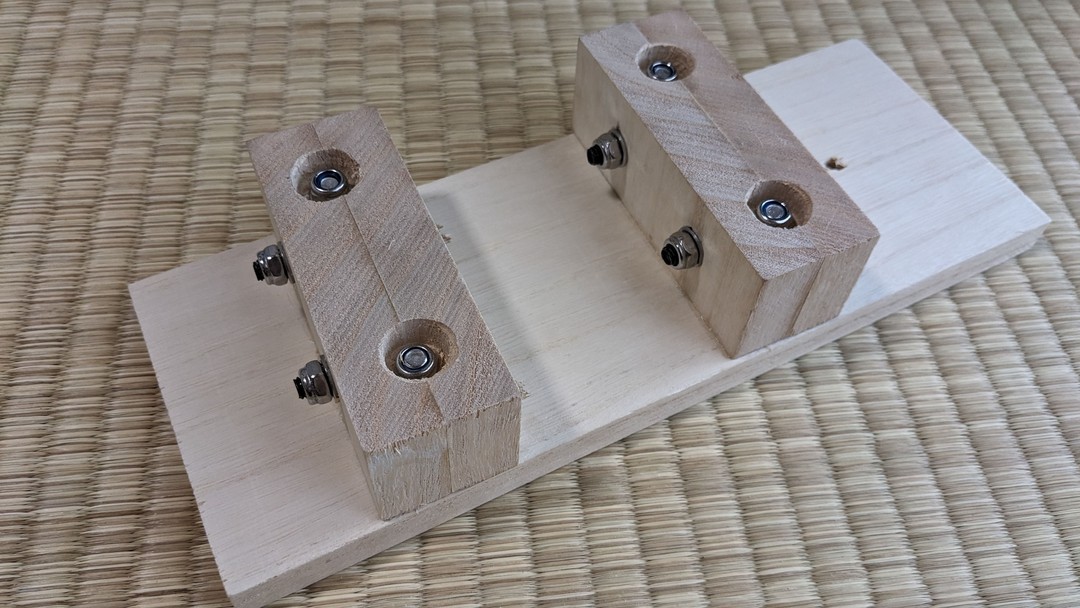
17. Align with the lines drawn on the base and glue the front and rear teeth with wood glue.
Do four sets: front, back, left, and right.
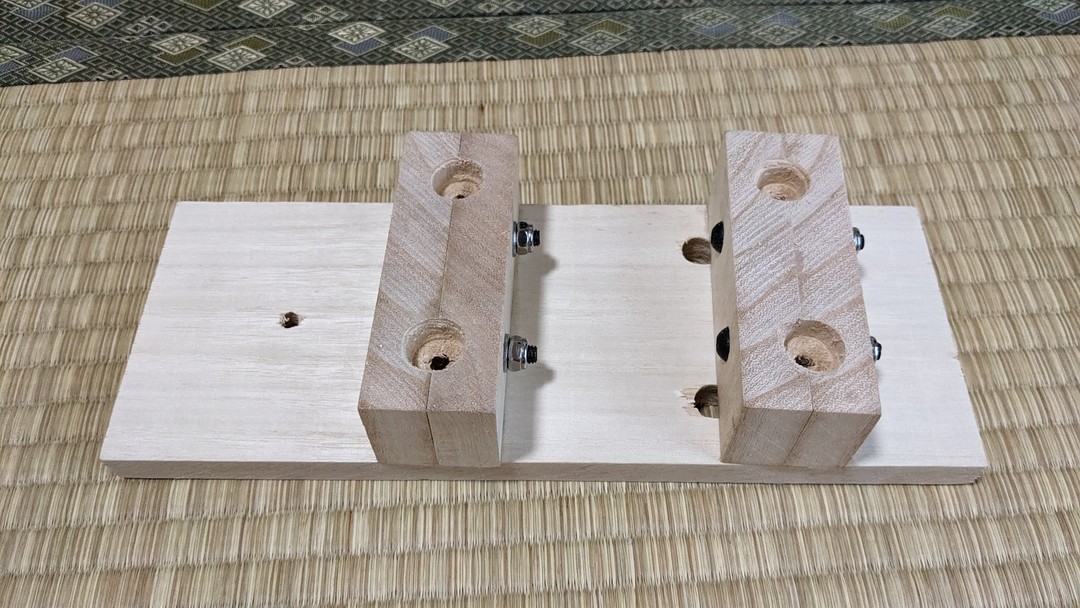
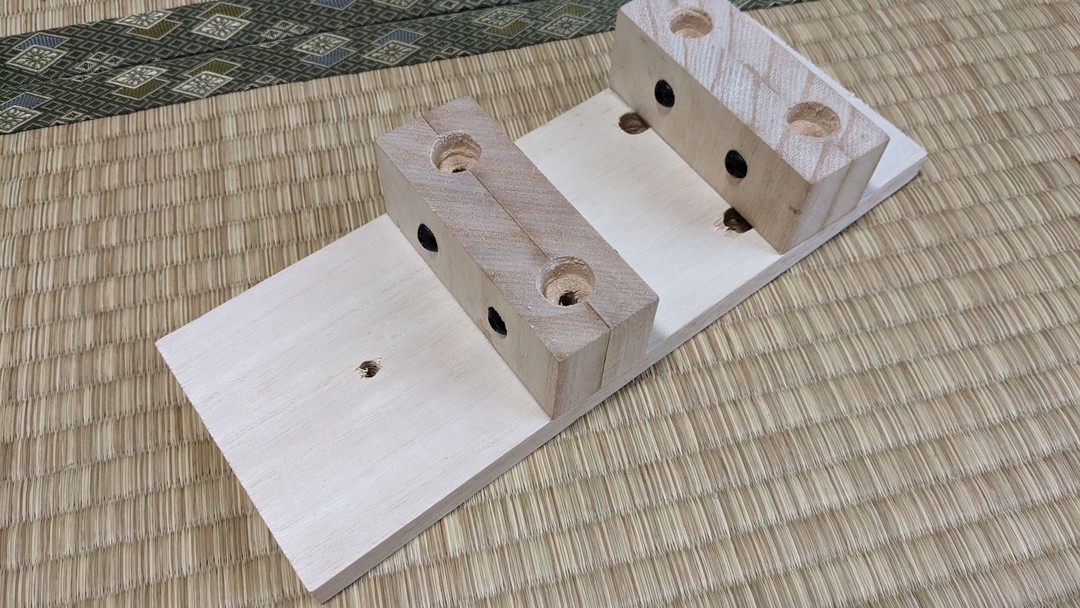
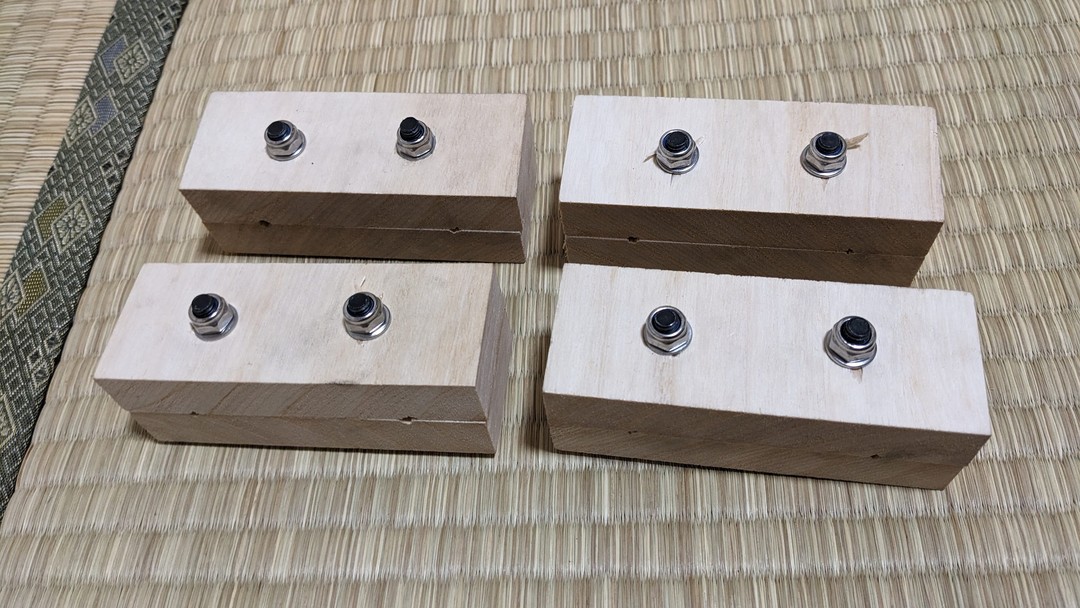
18. Before the glue dries, insert M6 round-head bolts

from the top of the base through the vertical bolt holes on the teeth.
* Check the pattern purchase email for bolt length.
From under the teeth, insert washers,
and tighten the nuts with a 10 mm socket bit.
Do this for the left and right holes on four pairs of teeth.
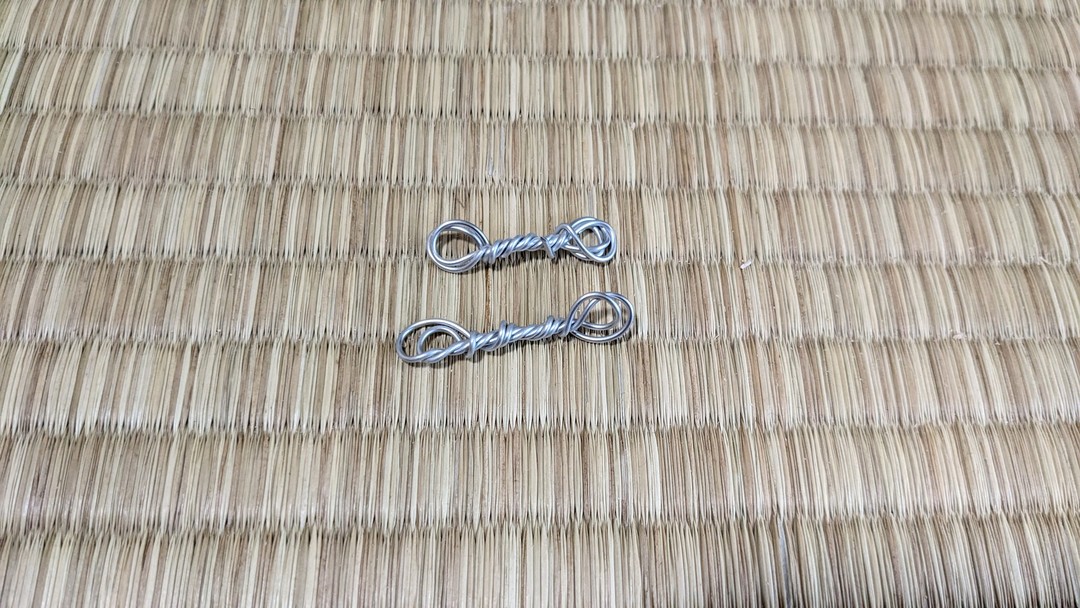
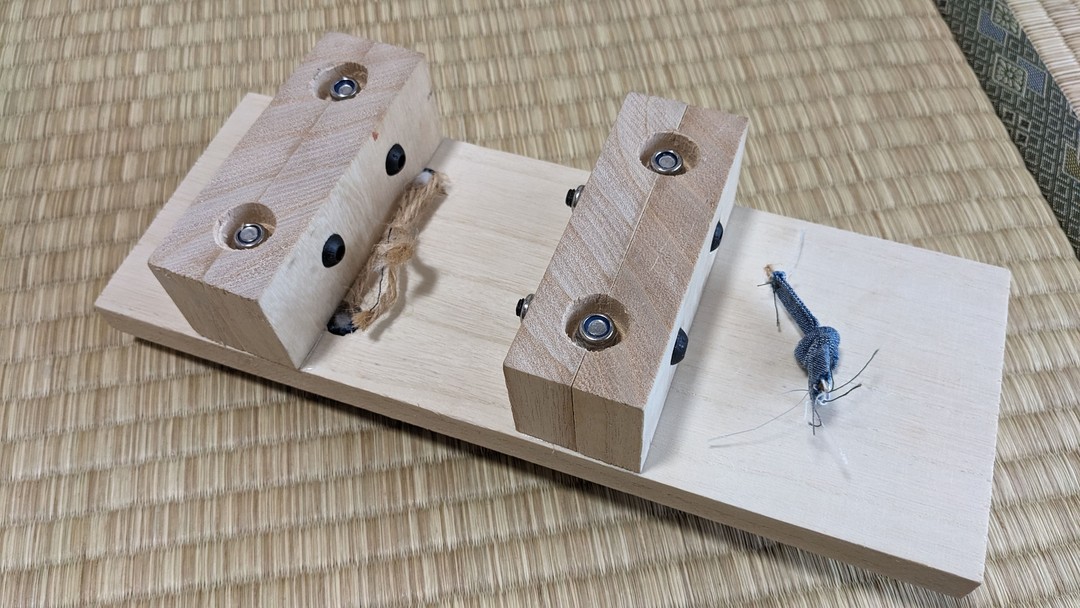
19. With wire, make seat washers (zagane) to secure the front thong of the hanao (straps).

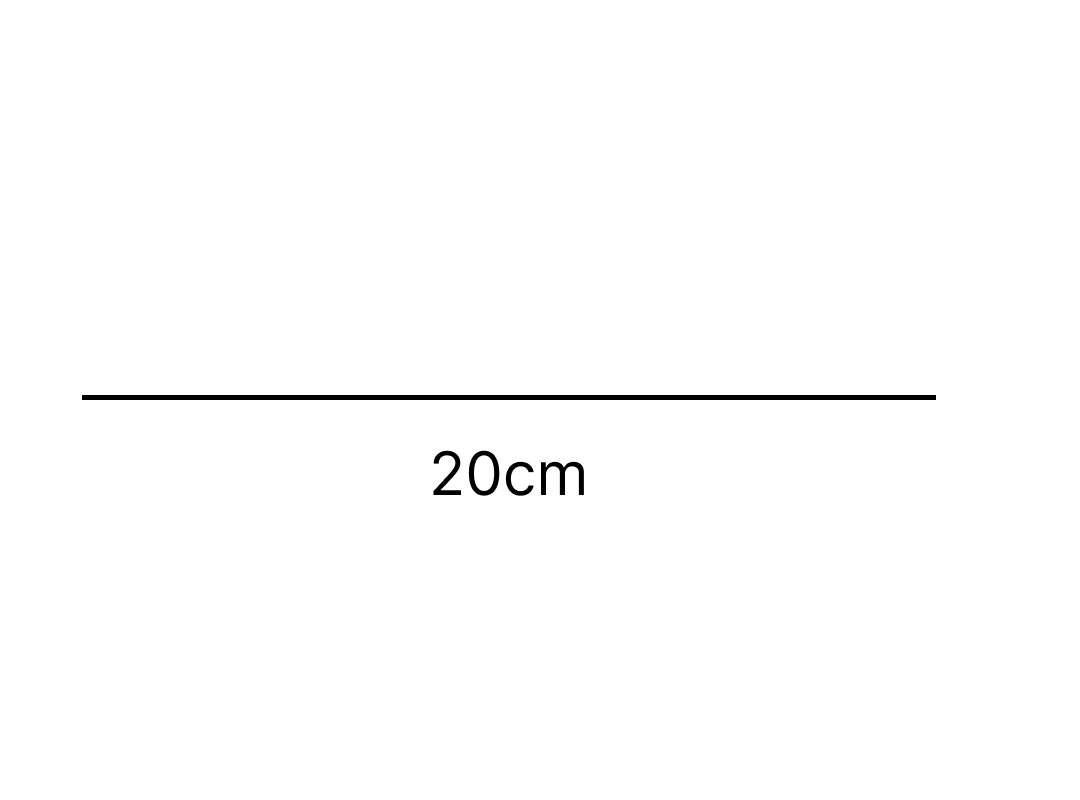
Cut wire to 20 cm,
and make a double loop.
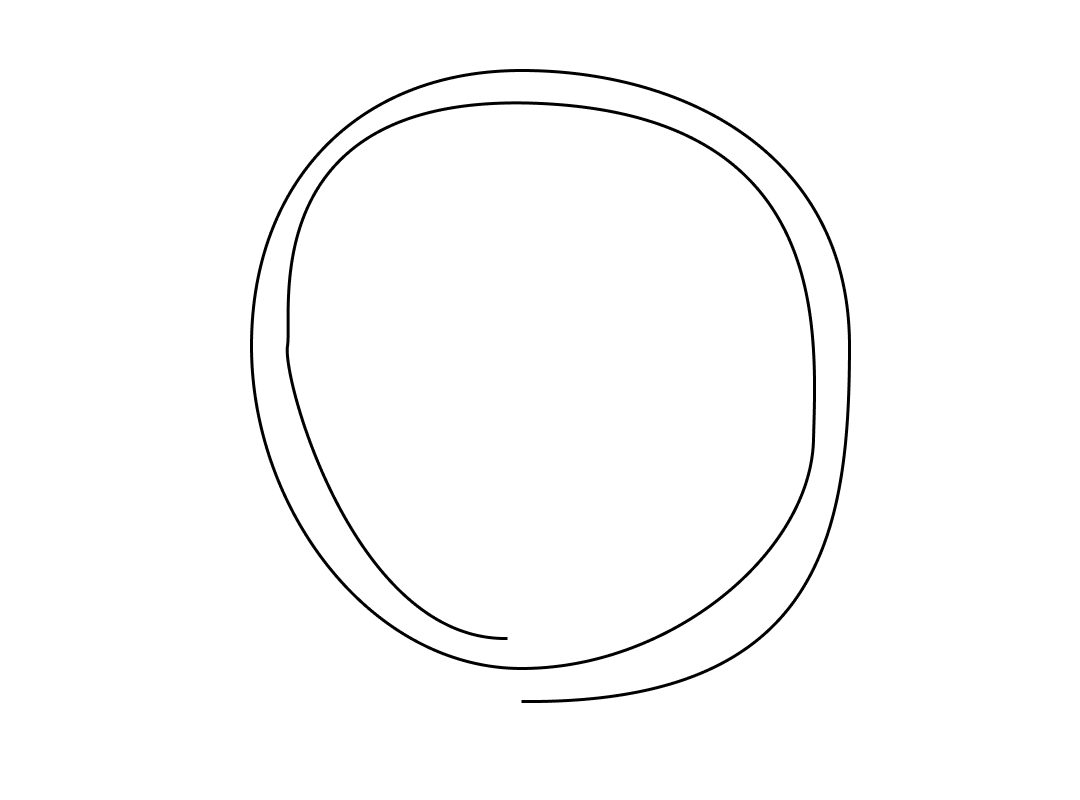
20. With both ends of the wire at the center, hold both sides and twist.
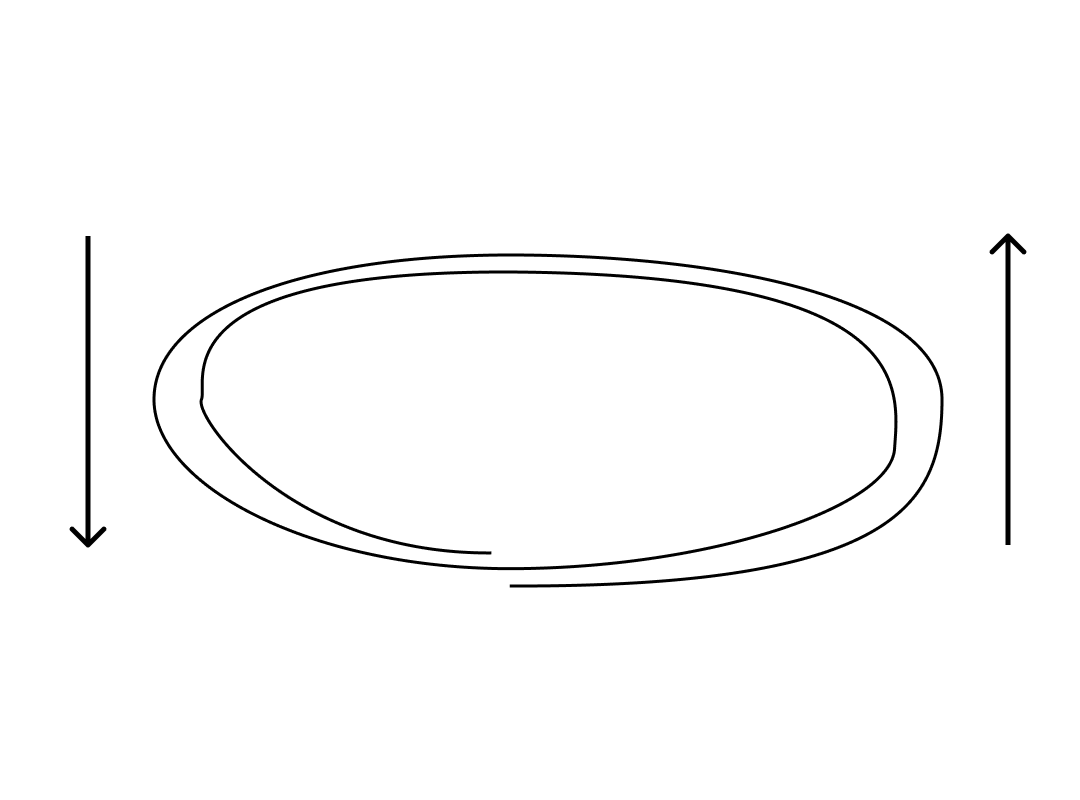
When the loops on both sides are about 5 mm, stop.
Make two.
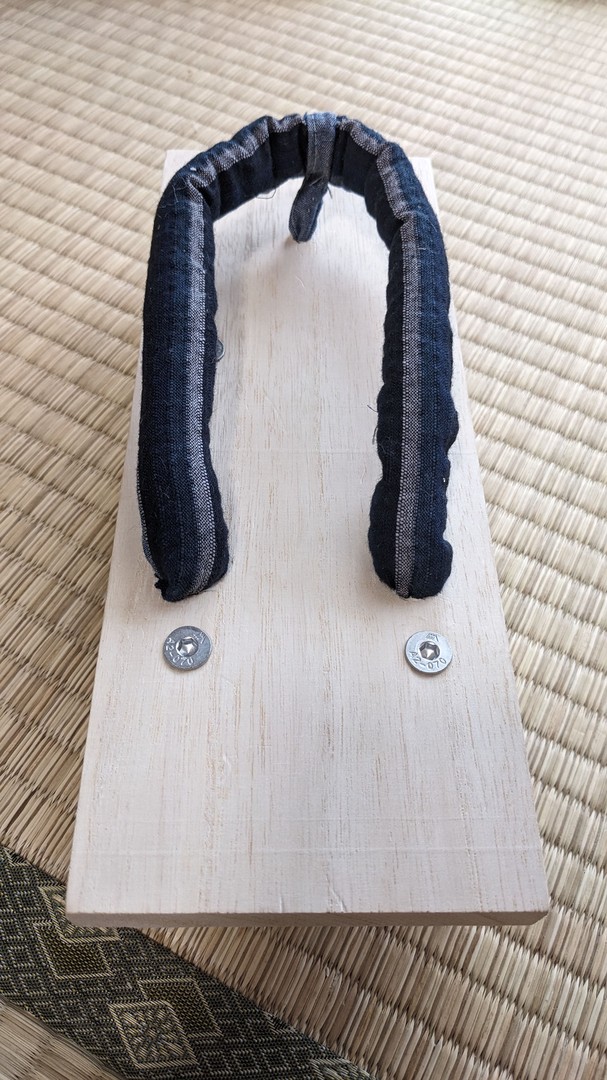
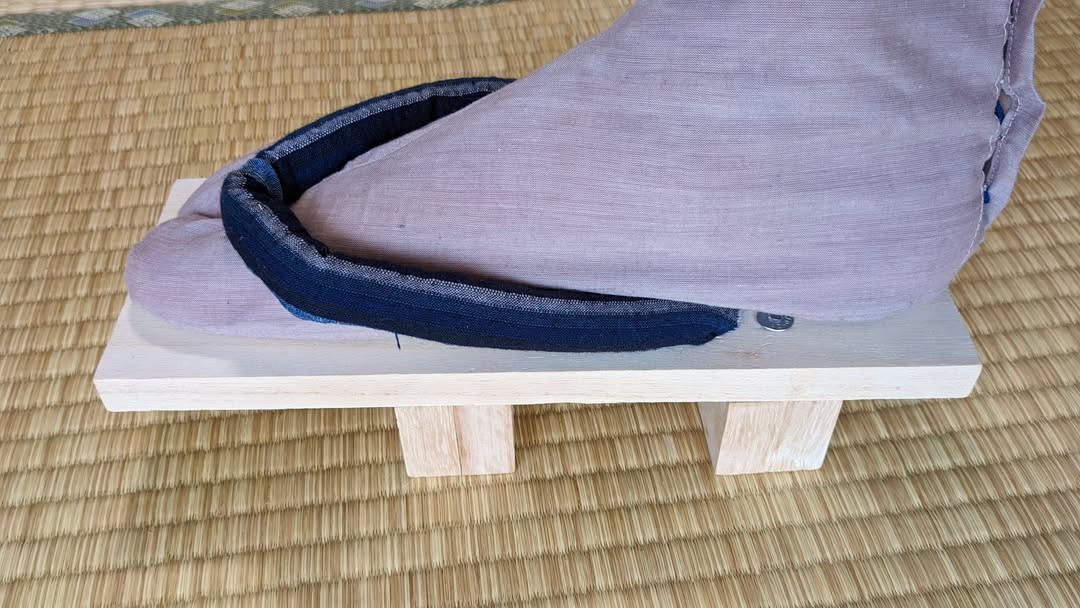
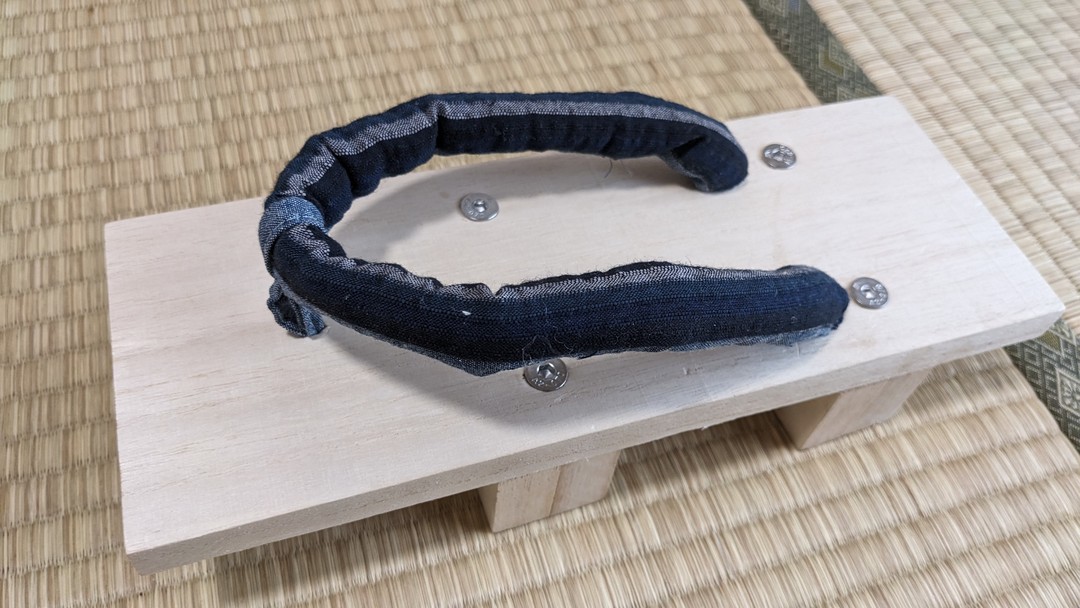
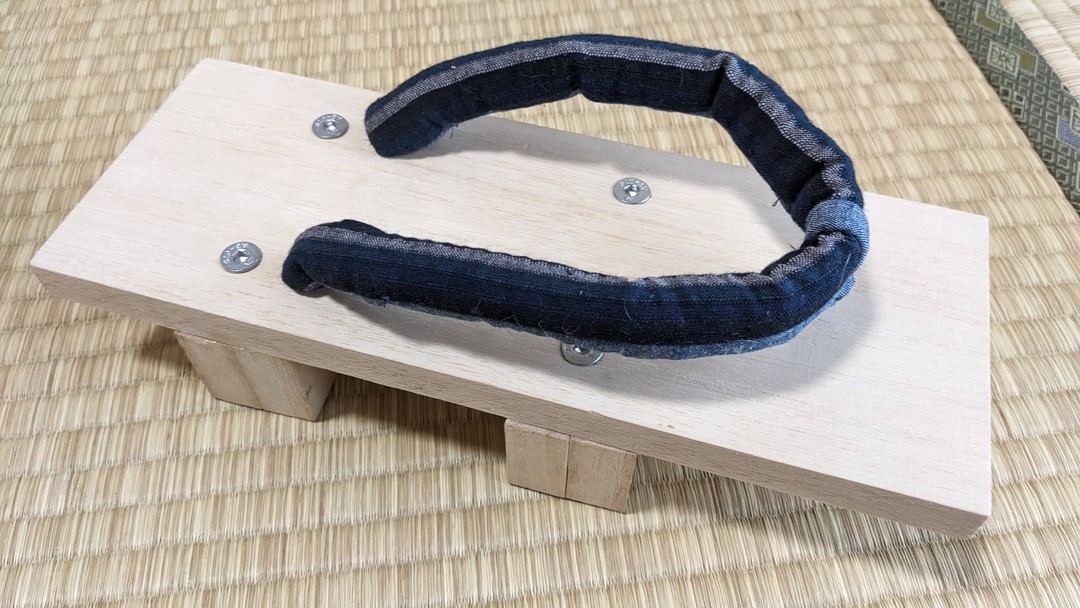
21. Pass the front loop of the hanao through the base hole and tie it to the seat washer.
22. Pass the rear thong through the hole and tie the left and right thongs under the base.
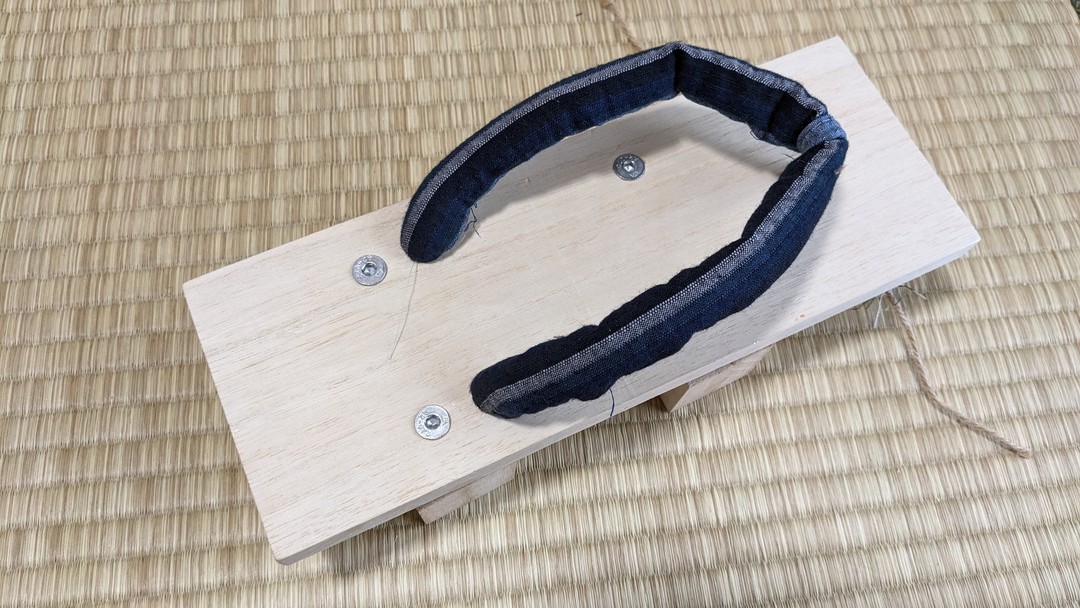
23. Trim off the excess cord.
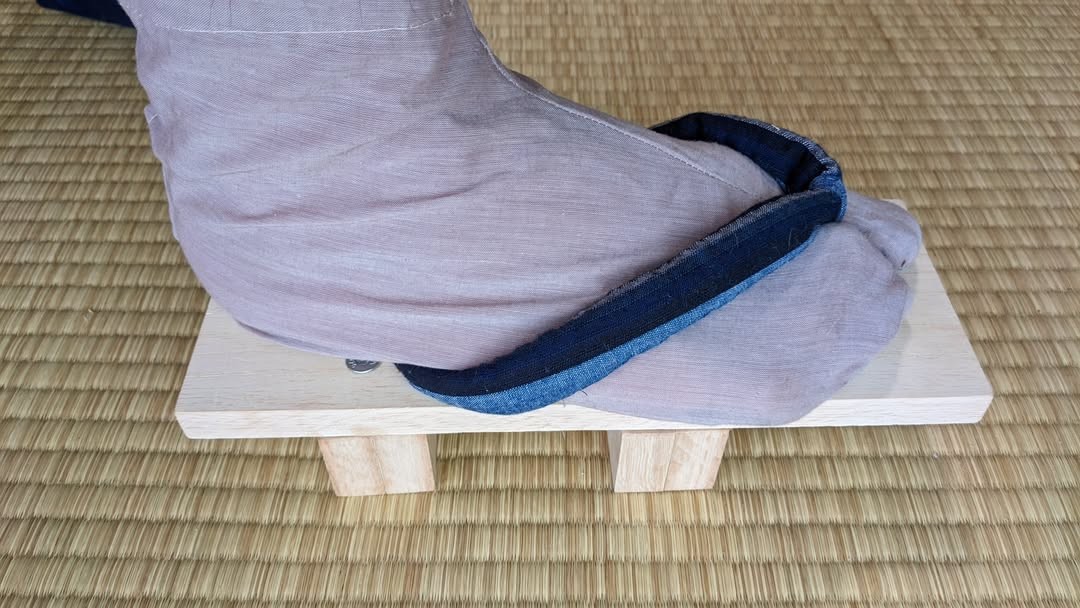
Done
Pattern purchase/download and material product links are :
– item page
https://wkimono.tokyo/en/katagami/geta_makaku
– Purchase pattern and download https://wkimono.tokyo/index.php/en/checkout/options/geta_makaku
– Product page for materials
Paulownia wood board, 15mm thick: https://a.r10.to/hPf34O
Paulownia wood board, 18mm thick: https://a.r10.to/h5vLmg
10mm socket bit: https://amzn.to/3Q4WJCG
Button bolt M6 (45mm in this case): https://amzn.to/4e3gPVH
Countersunk bolt M6 (50mm in this case): https://amzn.to/43TErHC
Nut M6: https://amzn.to/4uhsHK4